 |
 |
CorelDraw 101: Import and Export
Export JPG File
|
| |
|
|
|

|
|
Why JPG?
If you are exporting a photograph style image for the Web, JPG is the
best choice. It is one of two common formats that can be used on the
Web (GIF is the other). JPG images can contain full color information,
and this format offers excellent compression capabilities for fast downloading
of Web images.
|
| |
|
|
|

|
|
Export File Basics
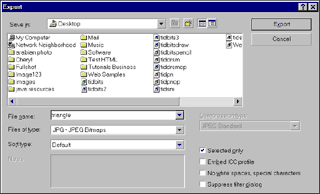
Select the items you wish to export with the Pick Tool. Choose File,
Export from the Main Menu. Select JPG as the File Type. Choose the name
and location for your file. Choose Selected only. (See Export
a File in this series for more information on these actions.)
|
| |
|
|
|

|
|
Set Size and Resolution
Choose the size for your file. Size is determined by end use and is
not dependent on the original size of the CorelDraw created image. CorelDraw
is vector based, so you can resize a graphic on export with no quality
loss. Choose 1 to 1 or Custom if you need to adjust size. Note: The
Custom size default does not offer proportional sizing. Click on the
lock icon beside the size information BEFORE you adjust the size. This
locks the proportion. JPG files are usually set for 72 dpi resolution
for Web use.
|
| |
|
|
|

|
|
Set Export Attributes
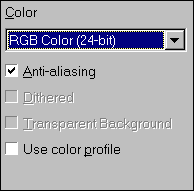
With the color selection box, choose RGB color (for quality color) or
Grayscale (for B&W photo) or Black and White for a black and white
image with no gray shading. If you are going to be using the file only
as a black and white image, choose this now, since the file size is
significantly lower. Choose Anti-aliasing.
|
| |
|
|
|
|
|
Check File Size
Check your file size as you resize or change modes. Small changes can
create dramatic adjustments in file size. When working with bitmap images,
file size is always a concern. Try for the smallest size that will give
the quality you desire by planning ahead and only including the information
that you will use, i.e., saving a larger sized image than you use does
not improve quality
it simply bloats the file size, and makes Web
download time high.
|
| |
|
|
|

|
|
Set Compression Level
Click OK and the JPG Export Window appears. Use the Compression slider
in the Properties section to set compression level. Click on Preview.
As you move the slider, watch the image in the right preview window.
This shows how your image will appear with the level of compression
you have set. Also watch file size below. You are trying for the point
where quality is high and file size is as small as possible. The Smoothing
slider can be used to smooth jagged edges. Click OK when you are satisfied.
|
| |
|
|
|
|
|
Next page
CorelDraw 101: Import and Export Tutorial Index
Import/Export Overview
Import a File
Edit Vector Import
Edit Bitmap Import
Export a File
Export TIF File
Export GIF File
Export JPG File
Export AI File
Export CDR File
         
|


 Find a programming school near you