 |
 |
CorelDraw 101: Import and Export
Import a File
|
| |
|
|
|

|
|
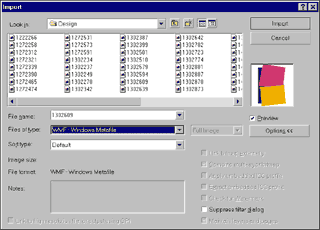
Select File
Choose File, Import from the Main menu. Locate your file from the Windows
file selector. You can choose the file type in the Files of Type window
to reduce the number of files that are presented in the selection window.
Click on the file you wish to import. Click Import.
|
| |
|
|
|

|
|
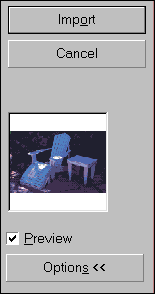
Preview Files
Click the Preview check box to the right of the file listing to turn
on a preview. Some files types cannot be previewed, and others have
not been saved with a preview, but most will show in this window.
|
| |
|
|
|

|
|
File Information
Click on File, Import in the Main menu. Choose your file. Locate the
Image Size and File Format section of the screen. This tells you how
large the file is and what type. Use this to make sure you have the
right file. You can also calculate whether you should crop or resample
your image as you import the file (see next step).
|
| |
|
|
|

|
|
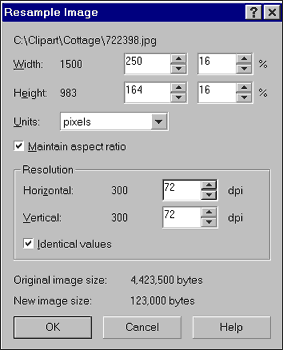
Resample on Import
You have the option to reduce the size of your image before you import
it. Look for the fly-out with Full Image as a default. Click to open
and choose Resample. When you click on import, the Resample Image menu
will open. Enter the size and resolution you require for the image.
In this example, the original was 1500 pixels wide, and I needed no
more than 250. Original resolution 300 dpi (for commercial printing)
and I needed 72 dpi for Web use. Check the original and new file size
- from 4.4 MB to .12MB.
|
| |
|
|
| |
|
Next page
CorelDraw 101: Import and Export Tutorial Index
Import/Export Overview
Import a File
Edit Vector Import
Edit Bitmap Import
Export a File
Export TIF File
Export GIF File
Export JPG File
Export AI File
Export CDR File
         
|


 Find a programming school near you