Masks Are Easy Part 2 pg 8: Production Graphics with Wendy Peck at webreference.com
 |
Masks Are Easy Part 2: PaintShop Pro Saved Selections/Masks | |
|
You can really unleash mask power when you combine saved selections with layer masks in PaintShop Pro. You can also save masks, which opens even more possibilities. We covered layer masks in Part 1 of this tutorial, so you may wish to review the information included there before continuing. |
||
|
|
||
|
|
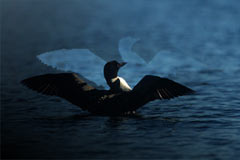
Saved selections in layer masks Open the original image. Right click on Background layer to open the pop-up menu. Choose Promote to Layer. Right click again and choose New Raster Layer. Drag Layer 2 to place it behind Layer 1. Fill Layer 1 with solid black. Select Layer 1 and choose Masks>New>Show All to add a layer mask. Choose Masks>Edit to activate mask editing mode. Choose Selections>Load from Disk and select the previously saved selection. The selection will come into the image in the original saved position. When you are editing masks, you can move the selection with any of the selection tools active. Move the selection to the desired location. Choose Selections>Invert if desired. The image shown here has the saved selection loaded and inverted. Now fill your mask with a gradient fill for this look. This gradient is a custom fill from white to black with the angle set to allow the background color to fill the bottom left corner. See the sample here with Masks>View checked. That's all. Turn off mask view and edit and you have the image shown at the beginning of this exersize. The pelican image is another example of the same technique
with a rounded diamond shaped selection. Instead of using a fountain
fill inside the selection, I filled it with a pattern of the same image.
|
|
|
|
|
|
|
|
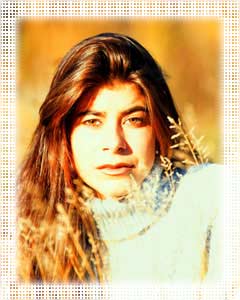
Saving and creating masks Choose Masks>Save to Disk to place a copy of your mask
on the hard drive. That is it! The mask you create can be applied to an endless number of images perfect for creating a consistent look throughout your Web site. The mask can be applied to any image, regardless of shape or size as you can see with the smaller, vertical sample shown here. Although PaintShop Pro offers many artistic variations to use with masks, we will have to leave that for another tutorial. You have plently to work with from this infomation though, and I urge you to spend some time getting used to working with masks in PaintShop Pro. It can be a little awkward at first, as you forget to switch to mask edit mode, or back, but the power you have to create great graphics, and then repeat the look over and over is well worth the learning time. Have fun! |
|
|
Photos © Tom Thomson Photography. Used with permission. |
Masks Are Easy Part 2 Tutorial IndexMasks Are Easy Part 2 Start
|


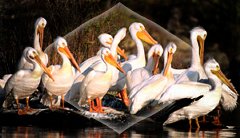
 Choose
Fill>Pattern in the Tool Options window. Click on the Pattern tab
and choose the file name of the original image in the New Pattern Source
drop down menu. Fill the mask with the pattern for very interesting
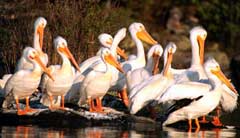
results. The original image is included for comparison.
Choose
Fill>Pattern in the Tool Options window. Click on the Pattern tab
and choose the file name of the original image in the New Pattern Source
drop down menu. Fill the mask with the pattern for very interesting
results. The original image is included for comparison. 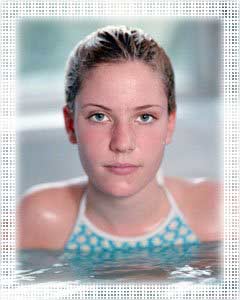
 To
retreive the mask, open your new image and prepare layers as for the
original. Select the layer you wish to add a mask to and choose Masks>Load
from Disk. Locate and select your saved mask.
To
retreive the mask, open your new image and prepare layers as for the
original. Select the layer you wish to add a mask to and choose Masks>Load
from Disk. Locate and select your saved mask.
URL: https://www.webreference.com/graphics/
Created: Apr. 16, 2000
Revised: Apr. 16, 2000
 Find a programming school near you