Masks Are Easy Part 2 pg 6: Production Graphics with Wendy Peck at webreference.com
 |
Masks Are Easy Part 2: Saving Masks in PaintShop Pro | |
|
|
PaintShop Pro handles saving masks in a different way than PhotoShop. Although you can save to an Alpha channel within the document, you do not have the ability to drag and drop a channel from one image to another. You can, however, save selections to a file which can be retrieved from any image, a versatile option. |
|
|
|
|
|
|
|
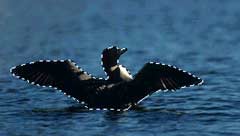
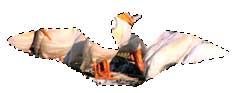
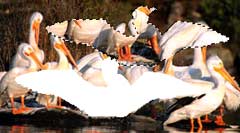
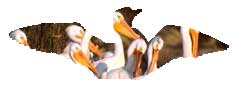
Save to an Alpha channel To retrieve the channel from within the same document, choose Selection>Load from Document. Choose the selection you named and click OK. The selection will return to the exact spot in your image. This is sometimes not desirable though, as you can see in the sample at the left. I wanted the pelicans to fall within the outline of the loon, but only their feet are showing. Hardly a stirring image. You can move the Alpha selection with a few steps though. Save the image you wish to add the selection to with a new name. This copy will be used just to create a mask in the correct location and we need to protect the original. With the original document open, load the selection into the newly saved copy of the image you wish to add the selection to. The selection will be in the wrong position. Move the selection to the location you desire. The image contained within the image will come with the move, but this is OK. Choose Selection>Save to Alpha Channel as above. Keep this document open and return to or open the untouched copy of the destination image. Choose Selection>Load from Alpha Channel and select the Alpha channel from the image we just created. The selection will be in the correct location now. You can see the results at the left. OK, so pelican heads in a loon shape is not exactly award winning graphics work, but you have to admit it is better than pelican feet. And it does illustrate the method very well. Note: Be careful with this since you are risking your original image if you are not careful to save a copy before you begin your manipulations. |
|
|
|
|
|
| Photos © Tom Thomson Photography. Used with permission. |
Save a selection to disk The original document does not have to be open in order to use a selection that has been saved to disk. Simply open the file you wish to add the selection to and choose Selection>Load from Disk. Go to the directory containing the saved selection, highlight and click OK. You can adjust the position of the selection before saving as we did for the Alpha channels. |
|
|
|
|
|
|
|
Masks Are Easy Part 2 Tutorial IndexMasks Are Easy Part 2 Start
|
URL: https://www.webreference.com/graphics/
Created: Apr. 15, 2000
Revised: Apr. 17, 2000
 Find a programming school near you