Masks Are Easy pg 4: Production Graphics with Wendy Peck at webreference.com
 |
Masks Are Easy 4: PhotoShop Mask Basics | |
|
|
PhotoShop has a masking feature called Quick Mask that is different from layer masks. See the next page for more information on Quick Mask. Create a layer mask |
|
|
|
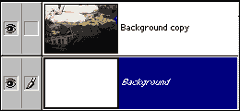
There are two methods to add a layer mask. You can choose Layer > Add Layer Mask > Hide All or Reveal All. Hide all fills the layer mask with Black, masking the entire layer. Reveal All fills the layer mask with white, or applying no mask to the layer.
The sample at the left shows both the original photo, and then a Reveal All mask added to the layer. Note there is no change to the photo. In this sample, the mask edit mode is on, as shown by the closest icon to the layer thumbnails. With this icon showing, any edits we do will be applied to the mask, not the photo. If the edit mask icon is not showing, click on the mask thumbnail in the layer row to activate it. |
|
|
|
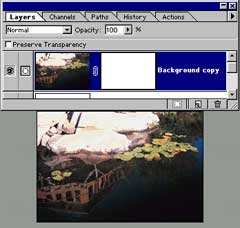
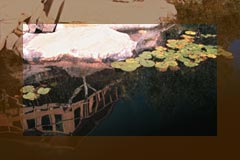
Edit the Mask As a simple exercise, let's add a mask to make the border pixels mask the photo with 50% transparency. Select All. Choose Select> Transform Selection and holding your ALT (Option) key to resize your selection from the center, set the size of your borders. Unless your image is square, you may want to move the sides independently from the top and bottom for an even border. Double click to set transformation. Choose Select>Inverse to select the border pixels. Choose Edit>Fill from the main menu and specify Black and 50% for
Blending Opacity. In the sample at the left, note how the selection
borders are reflecting the change to the mask, and therefore the photo,
but the photo remains untouched (see the thumbnail). The mask now has
a 50% gray border. This is masking the photo by 50% and allowing 50%
of the background, or white, to show through. I This is quite powerful, but you really could do this with the selection tools. Squares and straight lines are great for learning about masks, but let's evoke a little more mask power. We are going to use painting tools to make the border more interesting. |
|
|
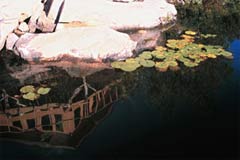
Photos © Tom Thomson Photography. Used with permission. |
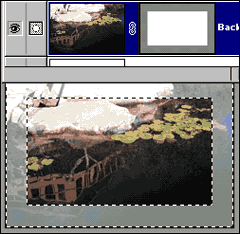
Adding paint effects to a layer mask This effect started with a wide border selection. Create a layer mask as above. Activate mask edit mode and fill selected area with a pattern fill (see Lines tutorial for directions on creating and defining a pattern). This creates a rectangular frame with the pattern texture allowing some of the background to show through.
You can also apply filters or any other paint tool to a mask. The effects are limited only by your imagination. The best way to actually become comfortable with masks is to play. If you can find an hour or two to experiment without production pressure, you will have your time back many times over in the future. Masks are great tools for automation and consistency in addition to the wealth of artistic opportunities they present. Carry on to the next page to learn about one of PhotoShop's best features, Quick Mask. In the next tutorial (April 17, 2000), we will cover alpha channels, saving masks and importing graphics from illustration programs to use as masks. |
|
|
|
|
|
Masks Are Easy Tutorial IndexMasks Are Easy Start
|
 f
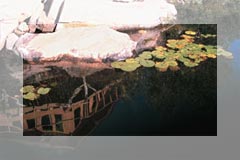
we change the background to brown and make no changes to the photo layer,
the results will be as shown here. Since the mask is working on the
photo layer, the 50% border will allow whatever is on the lower layer
to show through.
f
we change the background to brown and make no changes to the photo layer,
the results will be as shown here. Since the mask is working on the
photo layer, the 50% border will allow whatever is on the lower layer
to show through.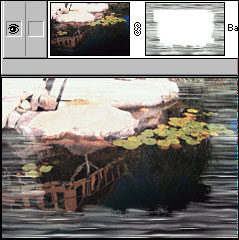
URL: https://www.webreference.com/graphics/
Created: Mar. 30, 2000
Revised: Mar. 30, 2000
 Find a programming school near you