Let There Be Lines pg 8: Production Graphics with Wendy Peck at webreference.com
 |
Let There Be Lines 8: CorelDraw and Freehand Lines | |
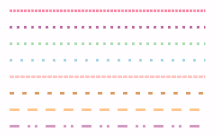 |
Do you want fast lines? Vector programs can deliver. As a testament to the ease of varied line creation, the collection of lines at the left took me just under 2 minutes to create from start to finish in CorelDraw. Obviously, I was not creating custom styles, but it does show that full vector programs come into their element with this topic. I often work with a combination of vector and raster programs. For example, if I needed many dotted lines, I would create them in a vector program and then export to a raster program for shadows, or to add to other elements. If I am working in PhotoShop and have one dotted line to create, I create it right there. If I am not sure of the style I require, or need several different types, I make the switch. Almost any graphics program can do almost any effectour profit comes from using the best tool for each task, and when it comes to dotted or dashed lines, nothing equals programs like Macromedia Freehand, CorelDraw or Adobe Illustrator. |
|
|
|
CorelDraw Dotted Lines |
|
Choose the Freehand tool and draw a line, using your CTRL
key to constrain to a straight line. 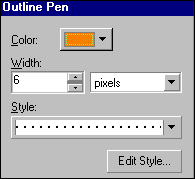 Click
on the Outline tool to open the Outline Tool Fly-out and choose the Outline
Pen Dialog. Set your Color (or leave that for now and choose later from
the Palette) and Line Thickness. Choose the desired Style from the drop
down list or choose one that is close to what you want and use the Edit
button to customize. Click OK and you have your line. Click
on the Outline tool to open the Outline Tool Fly-out and choose the Outline
Pen Dialog. Set your Color (or leave that for now and choose later from
the Palette) and Line Thickness. Choose the desired Style from the drop
down list or choose one that is close to what you want and use the Edit
button to customize. Click OK and you have your line. |
||
|
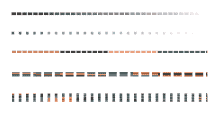
Variations of outlines converted to objects. The first two have fountain fills, with the final three using texture fills to achieve the look. |
CorelDraw Fountain Filled Lines Add one step and you are set to fill any line, including dotted and dashed lines with Fountain Fills or texture. Create your line and choose Arrange>Convert Outlines to Object from the main menu. Your outline becomes an object which can be filled with any CorelDraw fill. See the variations at the right and let your imagination go wild. Note: You can do scan lines in CorelDraw by creating a series of narrow lines, converting to outline, filling with white and using the Lens for transparency, but this is not an easy task. It is better to switch to Corel PhotoPaint and follow the directions for the PhotoShop method. |
|
|
Basic stroke variations in Freehand.
Variations of the pattern stroke in Freehand. |
Dotted Lined in Macromedia Freehand
|
|
| Gradient Filled Lines in Freehand | ||
|
Graduated fill lines created with the Rectangle tool in Freehand. The top one is 2 px and the bottom 4 px.
Variations of text converted to a path and filled with a graduated fill. Top sample is 24 pt type, with the bottom 3 at 36 pt and a variety of fill properties. |
Choose the Rectangle tool and draw a rectangle the desired size of your line (follow the status bar at the bottom of the screen to see selection dimensions). Choose Window>Inspectors>Fill to open the Properties window. Choose Gradient fill for the style, and set color and gradient balance. Click on the Stroke tab and specify no stroke. There is obviously no limit to the variety of sizes and fill combinations you can use with this method. Try some of the other fills to see if the magic look is waiting for you.
Finally, go on to the next page for a fun tool in CorelDraw. Make grids as fast as you can draw a box. |
|
|
|
Let There Be Lines Tutorial IndexLet There Be Lines Start |
URL: https://www.webreference.com/graphics/
Created: Mar. 16, 2000
Revised: Mar. 16, 2000


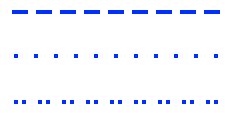

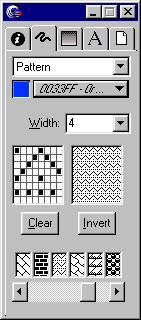 Freehand
creates dotted lines as easily as CorelDraw. Choose the Line Tool and
create your line. Choose Window>Inspectors>Stroke to open the
Properties window. Set your line width, color and choose your style.
I have shown just a few of the many available at the left. Basic styles
work best for narrow lines, while pattern lines show up better with
a wider line. For comparison purposes, all lines shown here are 4 px.

 And
here is one little trick to leave you with. To make an easy dotted line
with a gradient fill, use the period key on the keyboard. Set the font
size to size your dots, font face to set the shape of the dots and space
with kerning. When you are satisfied with the look, choose Text>Convert
to Paths from the main menu and then Modify>Join. Now you can fill
the object with a graduated fill. Perhaps not elegant, but easy.
  Find a programming school near you