Dingbats pg 8: Production Graphics with Wendy Peck at webreference.com
 |
Dingbats 8: Dingbats as Flash Symbols | |
|
|
Macromedia's Flash has caught the attention of the Web. Marcomedia's site has been identified as one of the top twenty sites in the world. Of course they make other terrific software, but Flash, with its vector based animation offers impressive capability for designer control and motion/sound control. Flash uses symbols for graphics ... you create or import a graphic element, convert it to a symbol and place it in a library. Place it once and use it many times without affecting file size. Dingbats work perfectly into this format, directly into Flash, or as a base for graphics created in vector programs like CorelDraw, Illustrator or Macromedia Freehand (see page 3 and page 6 of this tutorial). The sample at the left is a very basic Flash movie featuring a dingbat font as the basis for graphic symbols. Designers are doing amazing things with Flash and most of the graphics used are very simple - exactly like dingbats. Next time you see a Flash site, examine the simple graphic shapes. Movement is the star. (Take a trip to the Macromedia site for excellent Flash site examples.) |
|
|
Tip: It is good practice to use the stage area while creating symbols to prevent confusion as you build your movie.
Note: While it is possible to build an entire movie without ever creating a symbol, it is a bad idea. You will work harder, the movie will not be consistent, and the file size will be bigger. Symbols are the power of Flash.
Tip: You can test your color with the gradient window open. It acts as a floating window and the screen remains active.
|
Create Flash Symbols from DingbatsWorking with dingbats in Flash is much like any vector program. They are entered as text, and limited editing is available until the font is converted to a graphic. Create or open a movie. Choose the Text Tool from the Drawing Toolbar and click anywhere on the movie or stage (area around the movie often known as pasteboard in other graphic applications). Choose your dingbat font and type the character (Zone 23 Foopy 9, character "G" here). The cursor and text bounding box indicate the font is still text. To make changes to text, you must highlight the characters. You can convert the text to a symbol and edit color, scale, etc. later. Or, you can create the look you want before you convert to a symbol. Let's start by changing the font to a curve and changing color, and then talk about editing symbols. Change the Color
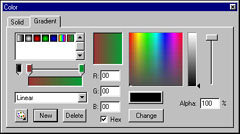
You can create preset gradient colors by clicking New, or select one of the current presets to edit. To change gradient colors, select the gradient color tab and choose a new color from the picker. You can also set transparency with the Alpha slider at the right of the screen. To save a preset, click the change button. Return to the screen and place the bucket cursor over any part of the selected area. Click to fill. You will have to click off the object to see the fill as the crosshatched selection covers the effect. This is not the place for a full color tutorial, but should be enough to get you started. Many people find setting color in Flash confusing at first, but it is efficient once you learn your way around. Manipulate your Graphic |
|
|
Foopy 9 © Zone 23
Fonts. |
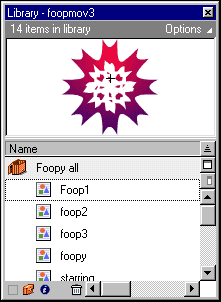
Create a SymbolOnce you are satisfied with the adjustments on your object choose the Arrow Tool and select your object. In the Main Menu, choose Insert>Convert to Symbol. You will be prompted to name your symbol. Do it! The numbers of symbols builds quickly - organization is very important when building a Flash movie. In fact, consider creating folders to help you locate symbols quickly. Click the Options fly-out at the top right of the Library window to create a folder. Once your symbol is created, you can use it over and over again, guaranteeing consistency and adding nothing to file size. You can also make global changes. In the sample at the top of this page, I originally had a lot of very bright pink in the graphics. Looked great until it landed on this page The pink went to war with the green and orange (as I should have known but got lost in the creative fun). Because I had used symbols through the movie, I was able to make three simple adjustments and change the total color scheme of the movie. I love symbols! That's as far as I can go with Flash for a dingbat article. If you use Flash, make sure that you consider building your dingbat collection. Dingbats are handy for any Web graphics. For Flash, there is no better tool. Have fun! |
|
|
|
Dingbat Tutorial IndexDingbat Tutorial Start |
URL: https://www.webreference.com/graphics/
Created: Jan. 20, 2000
Revised: Jan. 23, 2000


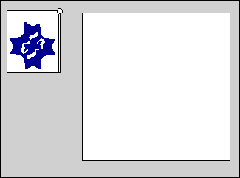
 Choose
the Arrow Tool from the Tool Bar and select the font. A dotted border
appears around the character. In the Main Menu, choose Modify>Break
Apart. Your character will now look like the sample at the left and
is ready to edit.
  With
the Arrow Tool, click anywhere to deselect and then click and drag along
any edge to change the shape of the object. This must be in one action
and you will see the line moving as in this sample. If you just click
and the object looks again like the sample above, you must click off
and start again.
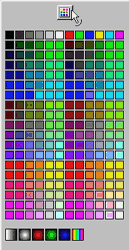
  To
change the color: With the Arrow Tool, click your object to select.
Choose the Paint Bucket Tool from the Toolbar and the cursor turns to
a Paint Bucket. Locate the Fill Color button in the Toolbar (top left
in this illustration). The current color is shown on the button. Click
to change. Choose your color from the picker (shown at left, or click
on the button at the top of the window for access to more choices and
gradients.
  Find
the buttons shown here on the Toolbar. Select your object with the Arrow
Tool. The top left button will smooth your object, while the top right
will straighten lines. Choose the curved arrow to rotate, and the bottom
right button to scale your object.
 Find a programming school near you