Dingbats pg 6: Production Graphics with Wendy Peck at webreference.com
 |
Dingbats 6: CorelDraw Basics | |
|
|
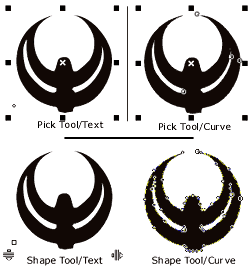
Illustration (vector) programs like CorelDraw and Adobe Illustrator make changing color, shape and scale of dingbat objects very easy. As soon as you convert a dingbat from text to curves, you have access to unlimited variations. The steps that follow will convert any text object to curves. Convert to CurvesDingbats, like all fonts, are stored as outlines. To access full manipulation options, the text must be converted to a graphic element. With the Text Tool, choose a dingbat font and type in your character (Sigil, character "m" used here). Change to the Pick Tool and drag to a large working size. Do not worry about your final size at this point, since vectors can be scaled at any time. Make sure your dingbat is selected and choose Arrange>Convert to Curves. The illustration at the left shows the object before and after the convert to curves action has taken place. In the Pick Tool example, note that there are now control points on the two white sections inside the outline. These have become separate areas, though they are still all one object - we will separate them in a minute. In the Shape Tool example, you can see that nodes are now available along all the curves. When the same object was text, only text tools were available (line and letter spacing). |
|
|
Sigil font ©Scriptorium. Used with permission. |
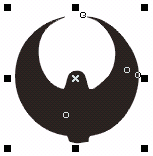
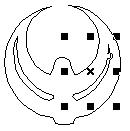
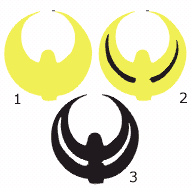
Separate the ObjectsWhen the dingbat is converted to curves, it is assumed to be all one curve. Not much more useful for manipulation than it was as text. In order to allow manipulation of individual sections, we must break apart the components so they become individual objects. Select the object with the Pick Tool. In the Main Menu choose Arrange>Break Apart. Don't worry if some of the areas fill in. When the object breaks apart the original color fills all areas. Plus, the object that forms the outline comes to the front. Note the status bar to confirm that you have several objects now - in this case, 4 objects are selected. There are two ways to reveal the hidden objects so you can change the fill color. First, you can choose View>Wireframe from the Main Menu. This takes all fill and outline information from the view, allowing you to select and change object attributes. Note that the interior object, which was invisible at normal view, is selected. However, this does not let you see the order of the objects. Since the largest object (the one forming the outline) usually comes to the front when objects break apart, you must click very close to the edge to select this object. Temporarily fill it with a contrasting color. In this illustration, I have filled the outer object with yellow (1), then from the Main Menu chose Arrange>Order>To Back (2). Note the tiny artifact at the top of the object. This is quite common when converting to curves and can usually be deleted. You may have to extend the adjacent curve to duplicate the original, since this artifact indicates that a piece of the curve was broken into a separate object when it was converted. In the final image (3), I have deleted the artifact, changed the outer object to black fill and filled the two interior objects with white to duplicate the original image. Although this seems like a lot of work, it becomes automatic and goes very quickly once you have completed the process a few times. Carry on to the next page for more dingbat manipulation methods and tips on preparing CorelDraw images for the Web. |
|
Dingbat Tutorial IndexDingbat Tutorial Start |
URL: https://www.webreference.com/graphics/
Created: Jan. 20, 2000
Revised: Jan. 22, 2000


 Find a programming school near you