3D Dingbats by Shirley Kaiser pg 7: Production Graphics with Wendy Peck at webreference.com
 |
3D Dingbats: Perspective Shadows with Eye Candy 3.1 | |
  |
If you'd like to add a perspective shadow, this step will show you how to do that with Alien Skin Eye Candy 3.1. Follow along if you have the plug-in. You can also download a free demo version from the Alien Skin Web site. As I discussed on previous pages, keeping the consistent light source toward the upper left corner above the shopping bag is a major key. 14. When we created a color layer to fill the blank lines of the shopping bag I suggested keeping an extra copy of the shopping bag shape. Now that hidden extra layer can come in handy. You can create the perspective shadow in this layer and keep it separate from your shopping bag. If you don't have a hidden layer for this, you can create one now using the magnetic lasso tool explained previously. Tip: I still suggest keeping a duplicate copy, so make a duplicate copy of this and use one of them for your perspective shadow layer, hiding the duplicate again. |
|
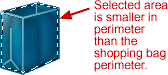 |
15. With the shopping bag outline layer being the active layer,
select the white shopping bag shape with the magic wand tool. |
|
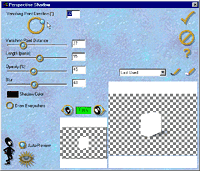 |
Now we're ready to apply the perspective shadow using Alien Skin Eye Candy 3.1. 16. From the (Photoshop) drop-down menu, click on Filter>Eye Candy 3.1>Perspective Shadow. Now the Eye Candy Perspective Shadow interface will appear. |
|
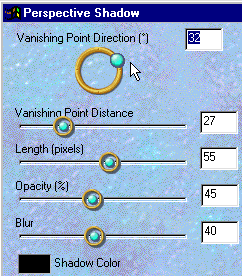 |
17. Feel free to use my settings if you wish, as shown in the screenshot to the left. I also continue to encourage playing and experimenting with all these variables to explore possibilities. Once you've decided on your settings, click OK (which will also close the Eye Candy plug-in), and save your image file. I've made a couple of samples, shown below, to demonstrate how off balance or incorrect a shadow can look if not applied with your light source in mind.
This tutorial has really barely scratched the surface of possibilities with Photoshop 6, dingbat fonts, and Alien Skin Eye Candy. I hope there is enough enticement here to spur you on to explore and play and experiment with these powerful and helpful graphics tools. For great resources to dingbat fonts, check out WebsiteTips.com's Fonts section or the Production Graphics Resources Fonts and Dingbats section. |
|
|
|
3D Dingbats Tutorial Index3D Dingbats: Bringing a Dingbat to Life
|
 If
you want to show a shopping bag getting ready to take off in flight
or possibly tilting over, this might work. However, it wouldn't work
if you want to show a shopping bag resting on a surface.
If
you want to show a shopping bag getting ready to take off in flight
or possibly tilting over, this might work. However, it wouldn't work
if you want to show a shopping bag resting on a surface. And
what's wrong with this one? The shadow is so strong and bold, unlike
the light for the shopping bag itself. If you would like the bold impact,
make sure the light source for the image is equally bold. It's typically
preferable to use the same, consistent light source for your image and
its shadow.
And
what's wrong with this one? The shadow is so strong and bold, unlike
the light for the shopping bag itself. If you would like the bold impact,
make sure the light source for the image is equally bold. It's typically
preferable to use the same, consistent light source for your image and
its shadow.
URL: https://www.webreference.com/graphics/guest/3d_dingbats/
Created: November 10, 2000
Revised: November 10, 2000
 Find a programming school near you