3D Dingbats by Shirley Kaiser pg 3: Production Graphics with Wendy Peck at webreference.com
 |
3D Dingbats: Preparing for Effects | |||||||
|
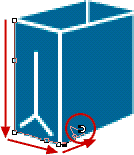
Let's get creative with this shopping bag dingbat font to the left. The original dingbat font prints as a solid color, so let's expand on that to bring it further interest and dimension. Using Photoshop 6 and finishing it up with Alien Skin Eye Candy 3.1 for the perspective shadow, it's fast and easy to produce beautiful results. |
|||||||
|
|
The first layer of the image is the blue shopping bag dingbat font. In order to add some color in the white blank areas of the shopping bag, let's add a new layer under the dingbat font to fill in color behind the white lines as shown to the left. |
|||||||
 |
1. To create a new layer, from the menu, click on Layer>New Layer or use Shift+Ctrl+N on your keyboard. 2. Make sure your new layer is under the shopping bag layer. You can move the layer via a drag-and-drop method with the Layer window holding your mouse button down on the layer to be moved and moving it to its new position. Or, from the menu, click on Layer>Arrange>Move Backward, or use Shift+Ctrl+]. Tip: Make a duplicate layer of each dingbat font being used, and then hide the duplicate layer. Then you have them to use later if you wish, start over easily, and you'll have the original font information and color for future reference. (Many effects and plug-ins require a rendered layer, which removes the font information.) |
|||||||
 |
3. Now you'll need the outline shape of the shopping bag selected, which you'll then fill with white in preparation for filling in with a subtle gradient color scheme. The subtle gradient will help provide light and contrast for the more dimensional feel we're after. To select the shopping bag area, I'd suggest using the magnetic
lasso tool. |
|||||||
 |
Position the magnetic lasso at the edge of the shopping bag and click once with your mouse, guiding the lasso with your mouse. If you wish to anchor the lasso, such as changing direction around a corner, click again with your mouse, and then continue. You can also press your delete key to go back an anchor if you wish to change the selection. |
|||||||
|
Once you've gone all the way around the outer edge of the shopping bag, connect the end with the beginning by clicking within the first anchor. Your selection will hopefully look much like the image sample with the selection completed. 4. Keeping your selection, click on your new color layer in the Layer box. You'll need to contract your selection just a bit so that you don't end up with jagged edges. So, from the menu, click Select>Modify>Contract. The Contract Selection pop-up box will appear, and select Contract by 1 pixel, and click OK. |
|||||||
|
|
5. Now you can fill the selected area. As usual, Photoshop offers
a variety of choices for how to do this. You can Tip: I suggest making a duplicate layer copy of this color layer and hiding it as I suggested for your fonts. An extra shopping bag area selection could come in handy as you experiment and try out various textures and presets. Now we're ready to start playing with the Gradient tool! By the way, if you haven't yet saved your image file, now is a good time. |
|||||||
|
|
3D Dingbats Tutorial Index3D Dingbats: Bringing a Dingbat to Life |
|||||||
URL: https://www.webreference.com/graphics/guest/3d_dingbats/
Created: November 10, 2000
Revised: November 10, 2000


 Find a programming school near you