CorelDraw 101: Basic Toolbox pg 5: Production Graphics with Wendy Peck at webreference.com | WebReference

CorelDraw 101: Basic Toolbox pg 5: Production Graphics with Wendy Peck at webreference.com

Logo

CorelDraw 101: Basic Toolbox

Freehand Tool Overview


Choose Freehand Tool
Click on the Freehand Tool in the Toolbox. This is your freehand drawing tool and is used to create drawn objects that are not variations of rectangles, spirals or circles.


Draw Curved Line
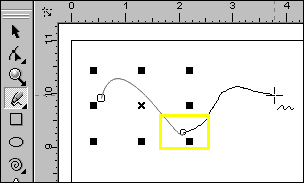
Choose Freehand Tool. Click and drag to draw the shape you desire. You can release the mouse button and still continue with the same object, by clicking close the the last node in the section you have just completed. The new line will automatically join to the end of the last one. In the sample above, the yellow rectangle highlights where the line was stopped and then started again.


Draw Straight Line
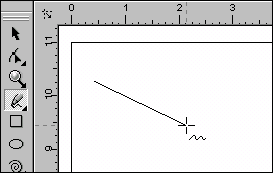
Click and release your mouse button to place the initial node for your line. Move your cursor to the desired end for your line. Click the mouse to place the end node. You can constrain the line to 15 degree increments by pressing your CTRL key as you position the end node (use this to create a straight line). You can also join a new line to this object as in step 2.


Create Closed Shapes: Part 1
Choose Freehand Tool. Click and drag in an approximate circular shape, but do not bring the end all the way to the starting point as in the top sample above. Click a color in the color palette at the right edge of the screen. This should fill your object with color, but since the ends are not closed, the fill does not show. Look at the bottom right of your screen to note that the color status area shows that the object is filled.


Create Closed Shapes: Part 2
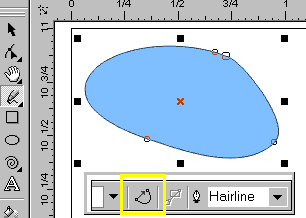
Click on the Auto-Close button in the Property Bar above your workspace (icon shown highlighted with a yellow rectangle in a cutout from the Property Bar). Your object should fill as the end points are joined.


Change Outline
Find the Outline section of the Property Bar above your workspace. Click on the fly-outs to select desired outline size or style.


Freehand Tool Fly-out
Click on the triangle in the bottom right corner of the Freehand Tool to open the fly-out tool options. This presents other freehand tools, but all are outside the scope of this basic tutorial.


Freehand Tool Properties
Right click on the Freehand Tool to open the Freehand/Bezier Options window. Most of these controls are for advanced features. The Auto-join can be increased if you would like CorelDraw to automatically join nodes that are further apart.


Next page

CorelDraw 101: Basic Toolbox Tutorial Index

Object Overview
Pick Tool Overview
Shape Tool Overview
Zoom Tool Overview
Freehand Tool Overview
Rectangle Tool Overview
Ellipse Tool Overview
Spiral Tool Overview
Polygon Tool Overview
Graph Paper Tool Overview

Front page2345678910


URL: https://www.webreference.com/corel101/4/
Created: January 26, 2001
Revised: January 26, 2001