Illustrator Photo Crosshatch - Giordan on Graphics | 3
![]()
![]()


Step 1-
Optimizing the image for tonal areas
To many people, using the Photo Crosshatch filter is a simple matter of placing an image in Illustrator and applying the filter.
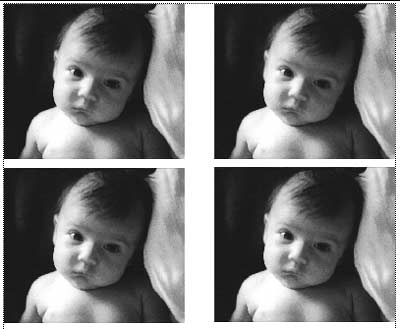
You quickly run into problems with this approach, in that the filter is applied so that there is a threshold break where the lines start and stop, and a ton of detail is lost along the way. We're going to avoid loosing detail by duplicating the image four times and filtering each image copy to accent a unique area of the tonal range.
To get started, be sure to select a photograph that has a well distributed tonal range, with rich blacks and strong highlights. You will still loose some detail in this process, so make sure that the subject matter is well defined.
Place the image in Illustrator by selecting File>Place. Select the image and copy and paste it three more times, for a total of 4 images on the page. Choose the selection tool and move each image into a grid as shown.
![]()
Produced by Daniel Giordan
All Rights Reserved. Legal Notices.
URL: https://www.webreference.com/graphics/column8/
Created: Feb 2, 1999
Revised: Feb 2, 1999
 Find a programming school near you