Into the Shadows pg 6: Production Graphics with Wendy Peck at webreference.com
 |
Into the Shadows: Separate PSP Shadows from Objects | |
 |
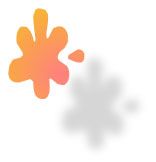
Wouldn't it be nice if you could just work with the shadow, moving it where you would like? Well, you can. It is a little work, especially if you would like your shadow to be resized, but it is not difficult. Follow along step-by-step and it will make sense. Why would we bother? Well, look at the image at the left. PSP offers you the capability to position a shadow like this, but look at the shadow size. It is considerably smaller than the automatic shadow produced by PSP. You must go off on your own to manipulate shadows like this. |
|
|
|
Create the shadow for separating Note: PSP only allows you to place a shadow 100 pixels vertically or horizontally from the object. If this is not enough to clear the space to select the shadow, try a large horizontal shift. Between the two placements, you should be able to clear most objects. You may also be able to select the shadow with the lasso tool, if the object and shadow are not touching, but overlapping to prevent a rectangular selection. Now we want to take that shadow and make it a separate layer. Select the shadow. We are going to remove it from the object layer. Select Edit>Cut (Ctrl-X). Select Edit>Paste>As a New Selection. We now have our shadow on a separate layer and can move or edit as we wish. Move the shadow layer below the layer containing the object. Activate your move tool, and with the shadow layer active, move your shadow where you wish it to be. The shadow is a little large though. For realistic appearance, you will want to have the ability to adjust the size and shape of your shadow. Read on. |
|
|
Although it is a little hard to see the nearly transparent shadow in the above samples, it should give you an idea of the process. The top sample is the original shadow as it was pasted as a new image. The second shows the distortion and reduced size.
|
Adjusting the shadow size To start, activate the shadow layer, and select your shadow. Select Edit>Cut (Ctrl-X). Select Edit>Paste>Paste As New Image (Ctrl-V). You can now adjust the size and proportion of the shadow image. I find that it is easier to use the percentage of original sizing command. Don't forget to deactivate the Maintain Proportion checkbox if you wish to distort the shadow. Select all of the shadow image and select Edit>Copy (Ctrl-C). Now we can return to our original document to paste the new shadow. Activate the shadow layer (you cut the original shadow from this layer) and select Edit>Paste>Paste as Transparent Selection. Click to anchor the shadow. Activate your Move tool to place the shadow in the desired location and add any effects that you require. Although this method seems like a lot of work, it really isn't. I have provided the shortcuts that you need to work through quickly. Try it! You will be amazed at how quickly you can manipulate your shadows. And think of the freedom ... that is the big reward. Don't take your shadows for granted. There is no reason why we have to accept default settings. Our pages will gain new life for taking control of the way that light plays on our work. Have some fun ... there is a whole world of shadows just waiting to be discovered. |
|
|
|
Into the Shadows Tutorial IndexInto the Shadows: Isn't a Shadow a Shadow?
|


URL: https://www.webreference.com/graphics/column38/
Created: October 26, 2000
Revised: October 26, 2000
 Find a programming school near you