Paint Shop Pro Selections pg 2: Production Graphics with Wendy Peck at webreference.com
 |
Paint Shop Pro Selections: Selection Tools | |
|
Raster selection tools (top to bottom): Selection Tool, Freehand Selection Tool and Magic Wand.
A few of the shapes available to use with the Selection tool.
Triangle selections with Antialias turned on (left) and off.
|
Selection tool To create a selection, activate the Selection Tool, choose your desired shape from the Tool Options window, and click and drag to create a selection of the size you require. When you release the mouse button, the moving dashed outline will appear. The image below shows the selection in progress, along with the settings in the Tool Options window.
Selection tool options You can also feather your selection in the Selection tool Option window, which softens the edges of the selection. I prefer to add feathering as an after effect, since it is usually important to do the main selection accurately. You can add feathering to your selection by choosing Selections>Modify>Feather and specifying a value for the number of pixels you would like to have softened. The effect is exactly the same as choosing Feather in the Options window. |
|
 |
Freehand Selection tool To create this selection, activate the Freehand Selection tool, choose Freehand from the Freehand Selection Type drop-down in the Options window, and click and drag around the area you would like to select. When you release your mouse button, the ending point will join to the start point in a straight line. If you wish to smoothly connect the end with the start of the selection, it is most accurate to release your mouse button when you are a few pixels away from the start point. If you try to land exactly on the start point, you may end up with a tiny bump in the selection. |
|
|
The Point to Point selection tool allows easy selection using straight lines. |
Point to Point selection To create a section with this option, activate the Freehand Selection tool, and choose the Point to Point option from the Selection Type drop-down menu in the Options window. Click and release at the point you would like to start your selection. Move your mouse to the next place you would like to place a corner and click. Continue clicking new lines until you have the selection you desire. Double-click to set the selection. The end point will be joined to the beginning and the straight lines will change to the dashed, moving selection boundary. |
|
|
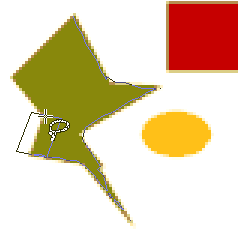
Clicking around the edge of an object with the Smart Edge selection tool ideally snaps a selection border right along the edge. In reality, it is usually not perfect and will need editing. |
Smart Edge selection tool However, in the interest of a complete subject study, and that once in a while automatic edge selection works like a charm, we will look at the Smart Edge selection tool. Activate the Freehand Selection tool and choose Smart Edge from the drop-down menu in the Options window. Click and release exactly on the edge you would like to select. Move to the first change in direction on the object edge and click and release again. A faint blue line is placed along the edge as soon as you click on the object. Double click to end your selection. The image at the left shows a magnified view of the selection in progress. If your edge is very clean, you can achieve a very good selection this way. You will most likely need to fine tune the selection by adding or subtracting from the selection, which we will cover later in this article. Smart Edge selection tool options Now that I have given a less than enthusiastic review of the Smart Edge tool, lets move on to one of my favorite selection methods the Magic Wand. |
|
Paint Shop Pro Selections Tutorial IndexPaint Shop Pro Selections: Back to Basics
|


URL: https://www.webreference.com/graphics/
Created: October 12, 2000
Revised: October 12, 2000
 Find a programming school near you