Photoshop Selections pg 6: Production Graphics with Wendy Peck at webreference.com
 |
Photoshop Selections: Modify, Save and Share Selections | |
|
|
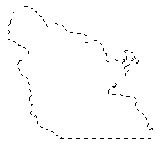
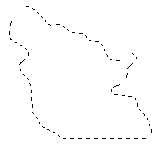
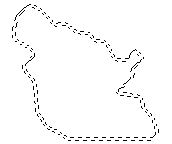
Modify your selection The samples at the left show the effect of smoothing your selection. The top image shows a selection with sharp bumps and hollows. Smoothing the selection by 4 pixels results in gentle curves. You can set the smooth amount to any value. (This selection is actually the same flower selection from above, moved to a new document see below to find out how to share selections between images.) Need a border for your selection, or just want to blur a few pixels along the edge? Choose Select>Border and set the value for the number of pixels you would like to manipulate. See left for the selection with a border added. Adding a border to a selection automatically creates an antialiased border as shown below. Use the Edit>Stroke command for a solid border.
When you would like to include one more pixel all around your selection, simple choose Select> Modify> Expand and set the value to 1. Ditto to select one less pixel, but choose Select>Modify>Contract. This is a feature I use a lot when removing backgrounds. |
|
 |
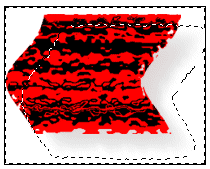
Feather your selection This is an option I use all the time. Feathering your selection softens the edges, and is very important when you are removing backgrounds or adding objects to collages, etc. Create your selection, then choose Select>Feather and specify a value. The image at the left has the original selection at the left, and the same selection feathered by 5 pixels. Both were filled with the same fill. |
|
|
|
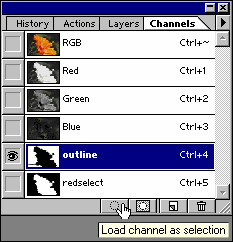
Save your selection To retrieve the selection later, choose Select>Load Selection, and choose the selection from the drop-down list in the Load Selection window. Photoshop saves your selection by creating a channel. Open the Channels palette, and you will see your selection represented as a channel. You can also load the selection back into your document by activating your selection channel and clicking on the Load channel as selection icon at the bottom of the Channels palette. This same feature lets us share selections between documents. Note: Don't panic when you see that your screen is filled with a grayscale image ... simply activate the RGB channel to get your colored image back. |
|
|
Channel is copied from one image to another.
|
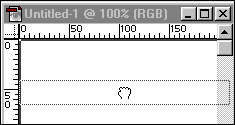
Share your selection Both the document containing the selection channel, and the document that you would like to copy it to, must be open. Set the window size on each document so that you can see both on the screen. Now, simply click and drag the channel from the original document to the screen of the new one. As you move your mouse over the new document, the cursor will change to a hand as shown at the left. Release the mouse. Check the Channels palette in the new document, and you will see the selection channel is now showing at the bottom of the channels list, with the same name as was originally assigned. You can now load the selection as above. |
|
|
So, there you have it. Certainly more than just the basics for one of the most basic operations in Photoshop. Selections are the backbone of Photoshop, and the more methods for selection that you learn, and the more you practice, the better your work will be. The added bonus is time. When you know which selection tool to reach for, you are halfway to completing your task. After all, how long does it take to select Edit>Fill, or hit the Delete key. Make sure you do not miss my earlier tutorial, Masks are Easy ... Really. Masks are nothing more than high-class selections, and with what you have learned in this article, you can really make your masks/selections work for you. |
||
 |
Trivia answer Create a layer and apply a layer effect. To separate the effects from the layer, choose Layer>Effects>Create Layer from the main menu (or right click and choose Create Layer from the pop-up menu). Your layer and its effects are now on separate layers. |
|
|
|
Photoshop Selections Tutorial IndexPhotoshop Selections: Back to Basics |
URL: https://www.webreference.com/graphics/
Created: September 28, 2000
Revised: September 28, 2000



 Find a programming school near you