Using JavaScript in HoTMetaL PRO 6.0: Assigning Macros to Buttons
Using JavaScript in HoTMetaL PRO 6.0
Assigning Macros to Buttons
HoTMetaL supports scripting through macros. Macros can be invoked by toolbar buttons and other means that we'll show you later in this column. All HoTMetal's macros should be stored in a single file, hotmetal.mcr. This file is in the Macros folder, under SoftQuad\HoTMetaL PRO 6.0, in the application area. Suppose you had installed HoTMetaL PRO 6.0 at the default location in drive C:. Your macro file will then be C:\Program Files\SoftQuad\HoTMetaL PRO 6.0\Macros\hotmetal.mcr. Notice that this file has an extension of .mcr and cannot be edited within the HoTMetal's environment. You can use any text editor available on your machine, such as the Notepad. HoTMetaL PRO 6.0's installation includes about 20 predefined macros. You can figure them out by browsing through the hotmetal.mcr file. You can also find them by selecting Macros from the Tools menu.
One of the ways to run a macro is to create a toolbar button and associate a macro with it. Clicking the button triggers the execution of the script defined in the macro. When you select Toolbars from the View menu, you get the following tabbed dialog box:
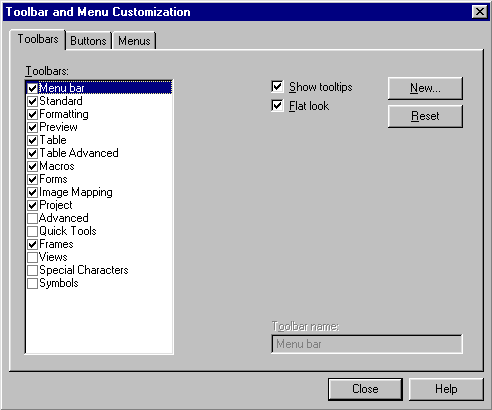
The first tab lets you add, delete, and manipulate toolbars. Since we don't want to change any toolbar, this tab will not be useful for us right now. Click on the Buttons tab. Select the Application Macros category. Notice that new text boxes appear on the right hand side of the form:
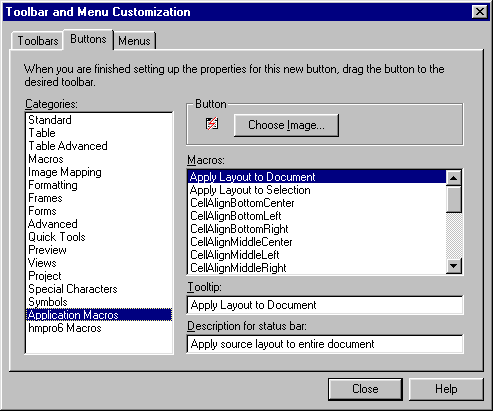
The first macro on the list is Apply Layout to Document. Let's install a button for it in the Standard toolbar. First, pick an image for the button. When you click the Choose Image button, you will get a chance to choose an image from a multitude of palettes. When you pick the Custom Images 2 palette, you will get the following view:
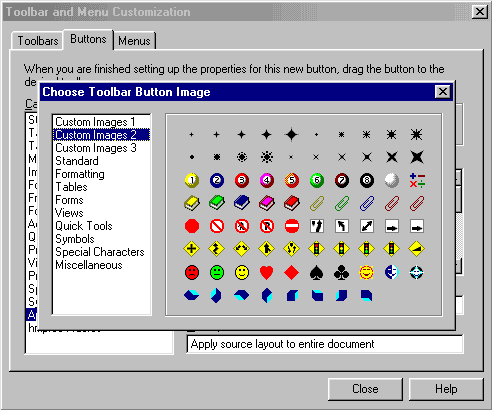
Pick the yellow Smiley image and you will arrive at the following:
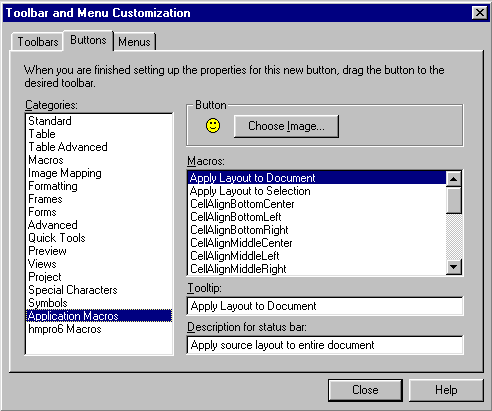
Now drag the Smiley icon to the Standard toolbar, or any other toolbar. Close the Toolbar and Menu Customization dialog box. The new button will now be visible on the Standard toolbar, or any other toolbar you have chosen to add the button to. You can find out the toolbar names by turning them on and off from the Toolbar and Menu Customization dialog box (invoked by choosing the Toolbars option from the View menu). Here is how the extended Standard toolbar looks like:
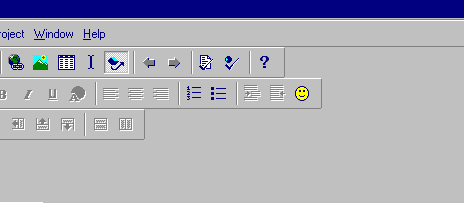
Let's try the macro now. Open an HTML file. The file about.htm in D:\Program Files\SoftQuad\HoTMetaL PRO 6.0\Tutorial\samples\lesson1 is a good example. Click on the HoTMetaL PRO 6.0's HTML Source View tab. Push some lines to the right by entering blanks in front of them. Now click the Smiley button. The source will change automatically to reflect the layout definition as described in the Customizations for hmpro6.rls dialog box (invoked by selecting Customizations... from the Tools menu). You will see that the source code returns back to its original layout format.
Produced by Yehuda Shiran and Tomer Shiran
Created: January 18, 2000
Revised: January 18, 2000
URL: https://www.webreference.com/js/column56/buttons.html


 Find a programming school near you