CorelDraw 101: All About Outlines pg 7: Production Graphics with Wendy Peck at webreference.com
 |
CorelDraw 101: All About OutlinesCalligraphy Outline Effect | |
|
|
Calligraphy Overview CorelDraw offers calligraphy effects to add a casual or hand-drawn look to your objects. This setting mimics the effect of a colored pencil or paint brush changing angles, and therefore thickness, around a curve or angle. The effect is best when used on objects with dramatic curves or angles. The samples above show the thick and thin nature of the calligraphy outline. The outline for the multicolored oval has been converted to an object, which is also covered in this tutorial. The options are endless. |
|
|
|
||
|
|
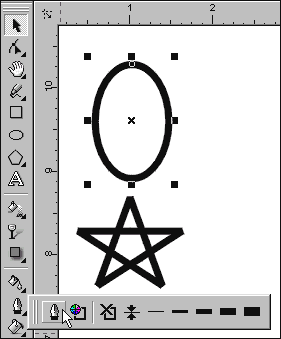
Create Oval and Star Draw an oval and a star (see Basic Toolbox for Graphics Magic for drawing tool tutorials). Set outline width to at least 8 pixels in order to see the effects. Select oval with the Pick Tool and click on the Outline Tool to open the fly-out. Choose the first icon to open the Outline Pen window. |
|
|
|
||
|
|
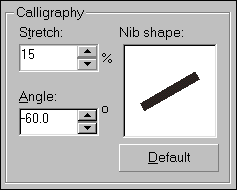
Choose Calligraphy Settings Locate the Calligraphy section of the Outline Pen window. The Stretch value sets the shape of the brush. A square brush, or 100%, will not vary line thickness. A lower setting creates a more pronounced effect. The angle value simulates brush angle. At 0 there is no effect. Click on the arrows to reduce and increase both angle and stretch, observing the sample as the numbers change. Note: Negative angle numbers move the brush clockwise, positive numbers, counterclockwise. Set Stretch to 15 and Angle to -65. |
|
|
|
||
|
|
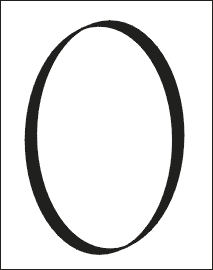
Results Click OK to accept the settings and observe your oval. Notice how the top left and bottom right lines are very thin, and opposite these points, the line is very thick. If we had used a value of +64, the thin lines would be at the top right and bottom left. Repeat this exercise with the star to see how straight lines react. |
|
|
|
||
|
|
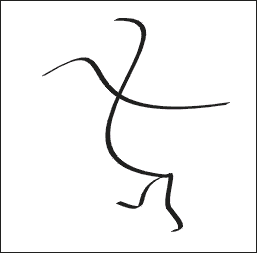
Calligraphy Lines Draw several curved lines using the Freehand tool and apply the same settings as you did for the star and oval. With lines, the calligraphy tool can really show off. Experiment with angles and widths to add energy and motion to your documents. You can easily sketch symbols with a hand-sketched look, or add a calligraphy outline to display text, symbols and clip art. |
|
|
|
||
|
|
Convert Outline to Object Select with the Pick Tool, or draw any object and apply a calligraphy outline. Choose Arrange, Convert Outline to Object. This is a very powerful tool to allow you to use the unlimited fill options provided with CorelDraw. Once you have converted your graphic, the outline becomes an object, and can be filled and manipulated as such. Try fountain fills with a calligraphy outline for a dramatic effect. Note: Once converted, you cannot change original calligraphy settings. |
|
CorelDraw 101: All About Outlines Tutorial IndexOutline Tool Overview |
URL: https://www.webreference.com/corel101/5/
Created: April 16, 2001
Revised: April 16, 2001


 Find a programming school near you