Pro Edges pg 9: Production Graphics with Wendy Peck at webreference.com
 |
Pro Edges 9: Flash with an Edge | |
|
|
Flash tends to be presented as full pages. No reason, really. Flash works very well in a small section of the page and can be quite dynamic. One of the best Flash samples I have ever seen was in two small pieces of a jewelry site entry page. Unfortunately, I did not mark the address and have not been able to find it again, or I would share it. If you are inserting small Flash movies into your site, then you must also integrate the look with the rest of your graphics. Since most Flash is done for full page display, you won't find much information on edge treatments. However, if you think of vector edges, like those in this article for CorelDraw, you will have a good start. |
|
|
|
In this sample movie, I used a very simple built in feature to make
the lines jagged (right click on the image and select play if you missed
the movie when you arrived). First, though, I will take you behind the
scenes of the movie and show you a wonderful feature of Flash that makes
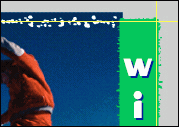
edges so easy. Compare This helped me in two ways with this edge. First, it chopped off the ragged edge on the box. I did not want that edge to be rough. I could have used a line to get the texture on the inside, but I needed the box for the color anyway. Two steps savedchanging the outline and placing a line (they do add up). I was also able to position a stylized line along the edge of the movie to achieve the random cutout look. Notice how the photo is also extending above the movie lineinstant micro cropping. To place lines accurately along the edge, just make underlying layers invisible. |
|
|
|
The ragged line is a default line shape. Choose the line tool from
the Toolbox. Set the width to 8pt or 10pt (the widest you can choose,
but you can always scale later if you need more). Choose the outline
selection shown in the illustration to the left. This is a magnified
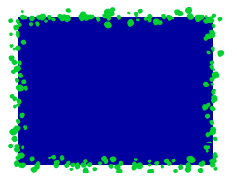
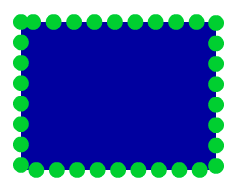
view of both 8 pt (red) and 10 pt lines. For the snowy cutout border I simply changed the line to white and placed it on a layer above the other full frame graphics. For the box you can have this same setting chosen when you draw your box or change it later. The first box here was drawn with the random border. The second one is the same box with the line style changed.
|
|
|
|
||
| Think of how you can incorporate small movies into your site. They do not need to be annoying ... the one on this page does its little show and then quits. The file size is very small (this movie is under 20k) and you can publish your movie so that even the small percentage of visitors who do not have the Flash plug in will see the final shot. You will be hearing about this from me a lot I like little Flash movies. And the possibilities for edges .... | ||
|
Images provided courtesy of EyeWire. Images © Eyewire and Internet.com and may not be reproduced in any way without prior written notice. |
Pro Edges Tutorial IndexPro Edges Start |
URL: https://www.webreference.com/graphics/
Created: Feb. 3, 2000
Revised: Feb. 5, 2000


 this
shot to the movie, and you will see that Flash just chops off anything
that is outside the movie area. The yellow lines approximate the edge
of the movie.


 To
Change the outline once it has been created, choose the Ink Bottle from
the Toolbox. Change the outline style as shown and click on the outline
of the box as shown below. Splotches to dots. That's it!
 Find a programming school near you