Pro Edges pg 4: Production Graphics with Wendy Peck at webreference.com
 |
Pro Edges 4: PhotoShop Frames | |
|
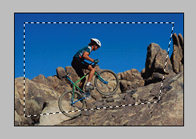
Handles for transforming selection
Irregular selection
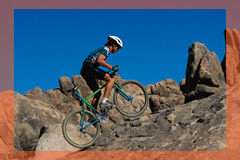
Rectangular frame with red fill and transparency.
Irregular frame with bright green fill and transparency.
Images provided courtesy of EyeWire. Images © Eyewire and Internet.com and may not be reproduced in any way without prior written notice.
|
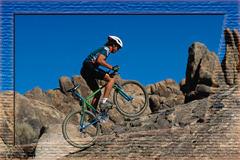
So what if you want an artsy look? Do you have to give up hours for that? Not a chance! In fact some of the fastest techniques produce the most dramatic effects. Here is where you can put the power of your software to work. PhotoShop Frames Open your photo and resize to final dimensions if necessary. Create a duplicate background layer, then create a new layer. Speed Tip: I will often produce several different frames in the same document with a new layer for each effect. I make all frame layers invisible, except the one I am working with. I can then toggle between effects for comparison. Once you have determined which frame to use, delete the unused frame layers. For a symmetrical frame, choose Select>All from the Main Menu. Choose Select>Transform Selection and handles will appear on your selection. Holding your ALT key while resizing transforms the selection around the center point. Holding your SHIFT key while resizing maintains the aspect ratio. You can use both the ALT and SHIFT keys together to maintain aspect and resize around the center point. Holding your CTRL key while clicking and dragging gives you free transformation for irregular frames. Double click to set the transformation. Once you have the area you wish to have framed selected, choose Select>Inverse from the Main Menu. This is your frame area. For the samples at the left, I filled the frame area and used the Effect>Fade command from the Main Menu. You can set transparency in the Fill dialog box, but I prefer to use the Fade Fill with preview checked so I can see the effects before I accept the settings. Note: The Fade command is only available immediately after you apply the fill. You can also apply any filter these frames. The sample here was created by copying the selection, and creating Layer Via Copy in the Layers Menu. I applied a canvas texture through Filter>Texture>Texturizer>Canvas in the Main Menu. I then used Filter>Fade to reduce the effect.
If you are framing the photos for an entire site, it is a good idea to create Actions for consistency as well as speed. Experiment with your own variations. A frame need not be boring or time consuming to hold your visitor's interest while presenting a unified and exciting look. |
|
Pro Edges Tutorial IndexPro Edges Start |
URL: https://www.webreference.com/graphics/
Created: Feb 3, 2000
Revised: Feb 4, 2000


 The
dimension is added through Layer>Effects in the Layers menu. This
is an Outer Bevel, with the Highlight changed to gray and Opacity reduced,
a Depth of 3px and Blur set to 0. Finally, I added an Inner Glow with
Color set to red.
  Find a programming school near you