Pro Edges pg 7: Production Graphics with Wendy Peck at webreference.com
 |
Pro Edges 7: CorelDraw Quick Frames | ||||||||
| Many graphics capabilities are shared by vector programs like CorelDraw and raster programs like PhotoShop or Corel PhotoPaint. But some graphics are easier to produce in one or the otherI find that I am constantly going back and forth between the two types. Here we will look at what vector programs do exceptionally well for photo edges. | |||||||||
|
The top line is exported as a series of dots in the correct size for section dividers, or where a strong divider is required. The individual dots were exported for use as bullets or design elements. The lines were created as 1px high and exported. The red one is shown as created. The blue one has been resized to 2px height and the yellow one is 4px high. |
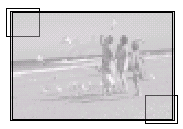
In this first sample, I have used color dots and a yellow border to this photo. I am making the assumption that this site is designed with primary colors and this treatment will tie the photo into the rest of the page. The dots and outline would be no great challenge in any graphics program.
The photo outline is simply a rectangle with a yellow outline applied. Send the outline rectangle to the back and group with the photo (or place both on a separate layer). The real power of vector graphics shows when you require individual graphic components for your pages. In the illustration at the left, the dots from the photo have been exported as separate graphics and colored lines created to enhance the page. It took less than five minutes to create all the extra graphics using the Export Selected Only feature available for all CorelDraw exports. |
||||||||
|
|
Quick Trick Don't forget to let us know what you have done. Send URLs, files, etc. to wpeck@internet. com. |
||||||||
|
|
|
||||||||
|
Images provided courtesy of EyeWire. Images © Eyewire and Internet.com and may not be reproduced in any way without prior written notice. |
Pro Edges Tutorial IndexPro Edges Start |
URL: https://www.webreference.com/graphics/
Created: Feb. 4, 2000
Revised: Feb. 5, 2000


 In CorelDraw,
draw a circle and make it the correct size. Add any features that will
remain consistent, like outline style and color, or fill. Duplicated
the circle by moving it to the right, using the CTRL key to constrain
it vertically. Right click before releasing the mouse button to create
a duplicate. Repeat the duplication with Edit>Repeat Duplicate from
the Main Menu (CNTL R) three times for a total of five circles. Fill
each with the desired color.
 For
a very fast photo album look which can add to the impression of family
times, draw two filled boxes for the corners. Send them to the back.
Draw a rectangle with no fill and place just inside the photo edges.
Use Arrange>Align and Distribute from the Main Menu to center horizontally
and vertically. I have included the wireframe view of this photo so
you can see the simple construction.
  Find a programming school near you