Reducing Noise, Correcting Chromatic Aberrations & Controlling Vignetting | 4
[previous][next]
Reducing Noise, Correcting Chromatic Aberrations & Controlling Vignetting
About Chromatic Aberrations
Chromatic aberrations show up as anomalous color shifts mostly on the outer perimeter of an image, in areas with distinct edge transitions. They are mostly evident when wide-angle lenses are used, but can appear with longer lenses as well. From a technical point of view, both Camera Raw and Photoshop provide nearly identical ways to fix Chromatic Aberrations
| This image shows a shot taken by professional photographer Richard Morgenstein with a Canon 10D and a 14mm wide-angle lens. Although the chromatic aberrations are not visible at first glance, magnification will probably show some annoying anomalies in the edges of the chrome headlights (Figure 7-27). |
 Figure 7-27 |
Reducing Chromatic Aberrations with Camera Raw
To use Camera Raw to reduce chromatic aberrations in images such as this:
1. Identify a likely area near the outer parameter of a likely candidate (for example, an image shot with a wide angle lens in bright lighting conditions with sharp edge detail).
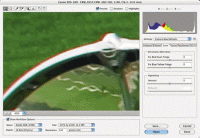
| 2. Magnify the area using Camera Raw navigation tools. (Select the Magnify tool and hold your cursor over the area you wish to magnify. Click and drag a rectangle that contains the area you wish to magnify, then release the mouse (Figure 7-28). |
 Figure 7-28 |
| In the magnified image shown here, you can clearly see the color fringing so typical of this type of chromatic aberration. (When light passes through glass, different color wavelengths are sometimes separated and shifted in focus ever so slightly. To visualize this, think of a common prism and the rainbow it produces. This shift is recorded by the sensor and appears as a color fringe, such as shown here.) (Figure 7-29) |
 Figure 7-29 |
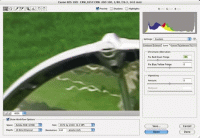
| 3. Select the Lens tab. Under Chromatic Aberration, select the appropriate slider. For this image, I chose Fix Red/Cyan Fringe and slid the slider to the left until I got what you see here (Figure 7-30). |
 Figure 7-30 |
It's very useful to understand how these controls actually work. When I first started using the Chromatic Aberration controls, I assumed they worked by simply looking for edges and removing or desaturating colors. But this isn't at all how they work, and I should have figured that out by simply watching the effect of moving the control sliders radically one way or another. Try that yourself on an image and you'll see what I mean.
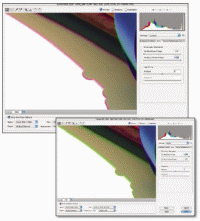
| You should notice a subtle distortion of your image, growing in intensity from the center of the image out to the edges. In fact, the distortion is limited to select colors that are actually expanding or shrinking (i.e., distorting) based on your settings. For example, if you chose Fix Red/Cyan Fringe, then either the red or cyan colors will be affected. If you chose Fix Blue/Yellow Fringe, only these colors will be affected (Figure 7-31). In the next section, I'll use illustrations to show more clearly what I'm talking about. |
 Figure 7-31 |
The key point here is: there are important practical implications. First, don't crop your image, apply Chromatic Aberration controls, and then expect good results. The color distortions are based on a lens model, and the minute you crop you've changed that model. Second, don't expect this to work on other aberrations such as a dead pixel or a highlight blooming that appear in the dead center of an image. The effect is more powerful at the edges of your image, and diminishes as you move closer to the center. And finally, the results you get will vary depending on the lens you use.
[previous][next]
URL:


 Find a programming school near you