Reducing Noise, Correcting Chromatic Aberrations & Controlling Vignetting
[next]
Reducing Noise, Correcting Chromatic Aberrations & Controlling Vignetting
With varying degrees, all digital cameras produce images with electronic noise, chromatic aberrations, and vignetting. Electronic noise shows up as extraneous pixels sprinkled throughout an image. Chromatic aberrations appear in transitional tonal areas as colored halos, color banding, or purple fringing (especially around backlit edges). Vignetting--darkening around image edges--occurs with a filter/lens/sensor mismatch. In this chapter, I'll cover how you can reduce the effects of these imperfections in your RAW files.
About Noise
Electronic noise is inherent to all RAW images, but its cause varies. It is more apparent is some images, and barely noticeable in others. Higher ISO values will enhance this effect, as will underexposure or long exposure. Process over-sharpening will also enhance electronic noise.
| The noise in this detail, enlarged to 400%, for example, is a result of shooting at a high ISO setting (Figure 7-1). Mark Richards captured this rare shot of the inside of San Quentin for People magazine by boosting the sensitivity of his Canon EOS 1Ds to 1600 ISO. He got the exposure settings he wanted, but obviously at a price in image quality. |
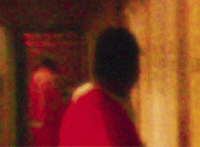 Figure 7-1 |
| On the other hand, the noise in this next detail (enlarged to 200%) taken at night at a normal ISO is due to a relatively long exposure (1/3 second) and it's mostly apparent in the dark sky (Figure 7-2). |
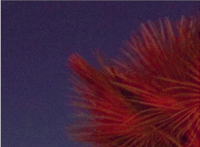 Figure 7-2 |
| Of course, noise isn't necessarily bad. As Luis Delgado Qualtrough, a fine art photographer puts it, "Noise gives an image dimension--and authenticity." Luis came across this old painting hanging on the wall in a very dark room at an old hacienda in Mexico. Using a Canon Digital Rebel set to 1600 ISO, Luis managed to get the shot without a tripod. Luis chose to leave the noise in the image, to emphasize the impressionist style of the painting. The final shot hangs in a Danish museum (Figure 7-3). |
 Figure 7-3 |
In any case, it's relatively easy to use Photoshop to remove or reduce the effect of electronic noise and--this is key--maintain image detail. You can either do this in Camera Raw, or after you open your file in Photoshop with the new Reduce Noise filter, which gives you much more options and frankly, in my opinion, better results. Once again, your choice of which to use will depend on what your want: speed and efficient workflow, or quality.
Using Camera Raw to Reduce Noise
Noise isn't always apparent when you examine an image at a low magnification, as you can see in the first image below. If you use Camera Raw's magnifying tools to enlarge your image after applying Camera Raw exposure and color controls (but before applying additional sharpening), the noise will become apparent, as you'll see later in the section. Pay particular attention to areas of continuous tone, and shadow areas. Note the makeup of the noise. Does it look like a colored patchwork quilt? Or is the noise speckled and monochromatic?
| Some images actually contain a combination of chromatic (color) and luminance (monochromatic) noise. As you'll soon see, getting a handle on the type of noise will help determine which Camera Raw control--Luminance Smoothing, Color Reduction, or both--will be more effective (Figure 7-4). |
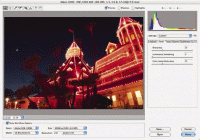 Figure 7-4 |
|
To begin the process: 1. Select the Detail tab. You'll notice right away the default Color Noise Reduction setting is 25, while Luminance Smoothing is set to 0 (Figure 7-5). Unlike the Sharpness setting, which is a relative value based on the type of camera you used, the Color Noise Reduction setting is an absolute value. This value is applied generically, and while it may or may not be right for your camera or image, it's almost always a good starting point. |
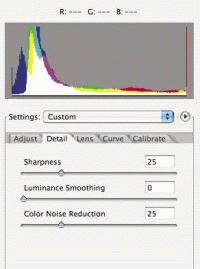 Figure 7-5 |
| 2. Enlarge your image preview to at least 100%, preferably higher. Start by sliding the Color Noise Reduction slider to the left, down to 0. Next, move the slider incrementally to the right, increasing the value (Figure 7-6). This affects the chromatic (color) noise and leaves details found in the Luminance (brightness) channel alone for the most part. If you go too far with the Color Noise Reduction setting, you won't lose detail per se, but you'll compromise color accuracy. (For the image shown here, a value of 50 is all it takes.) The chromatic noise is reduced without touching the Luminance Smoothing slider. |
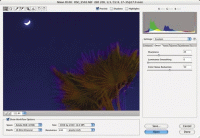 Figure 7-6 |
|
3. If increasing the Color Noise Reduction value doesn't do the trick--as in the next example--set it to zero and use Luminance Smoothing (Figure 7-7). .Go easy and increase the value incrementally. |
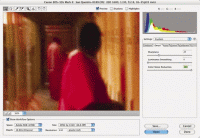 Figure 7-7 |
| When working on the luminance channel, you can quickly compromise image detail. For this image, a Luminance value of 100 blurred it appreciably (Figure 7-8). |
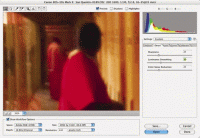 Figure 7-8 |
| 4. Sometimes a combination of Luminance Smoothing and Color Reduction produces the best result. You'll have to experiment to get the correct combination, as the correct values vary from image to image. Remember, the trick is to reduce noise without losing too much image detail. For this image, a Luminance Smoothing setting of 30 and a Color Noise Reduction setting of 25 worked best (Figure 7-9). |
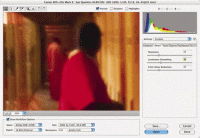 Figure 7-9 |
[next]
URL:


 Find a programming school near you