Reducing Noise, Correcting Chromatic Aberrations & Controlling Vignetting | 2
[previous][next]
Reducing Noise, Correcting Chromatic Aberrations & Controlling Vignetting
Saving Noise Reduction Settings in Camera Raw
|
Once you find an optimal setting for your camera, at a frequently used ISO, you can save specifically those settings and apply them to other similar images. To do this: 1. Select Save Settings Subset from the pop-up menu (Figure 7-10). |
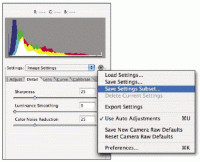 Figure 7-10 |
| 2. In the Save Settings Subset dialog window, select Details from the Subset pop-up menu. Deselect Sharpness (or whichever settings you don't want to include) and the Details Subset becomes Custom Subset (Figure 7-11). |
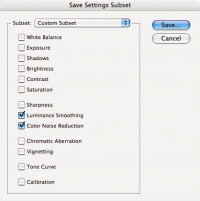 Figure 7-11 |
| 3. Select Save. Name your setting and make sure it is saved in the default Settings folder (Figure 7-12). |
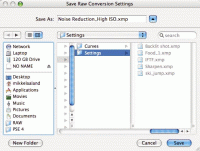 Figure 7-12 |
| Otherwise, it won't show up in the Settings pop-up menu or in Bridge's Apply Camera Raw Settings menu(Figure 7-13). |
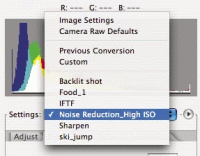 Figure 7-13 |
Using Photoshop's Reduce Noise Filter
The Reduce Noise Filter is new to Photoshop CS2, and like the Smart Sharpen filter, it's based on some fancy state-of-the-art software coding. Frankly, I find this filter to be very effective and it often produces better results than I can get from the Camera Raw controls. Of course, the minute I call the filter "state-of-the-art" you likely suspect there is a downside, and there is. The user interface isn't very intuitive, and unless you are working on a very fast computer, it is slow.
| There are two modes to this filter: Basic and Advanced. I'll show you how to use both, although most users will find the Basic controls more than enough. Regardless of whether you use the Basic or Advanced settings, you'll need to run your RAW data through Camera Raw. Use Camera Raw to optimize your exposure and white balance settings, as explained in Chapter 4, but I suggest you turn Color Noise Reduction to 0 and leave Luminance Smoothing to 0 as well (Figure 7-14). The Reduce Noise filter works on 16-bit files, but performance is slowed. |
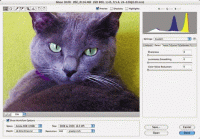 Figure 7-14 |
Basic Settings for Photoshop's Reduce Noise Filter
Let's start with the basic settings:
|
1. After preparing your RAW image in Camera Raw, select Open and bring it into Photoshop. 2. Select Filter > Noise > Reduce Noise from Photoshop's main menu (Figure 7-15). |
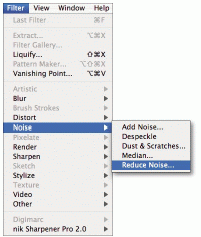 Figure 7-15 |
|
3. Enlarge your preview to 100% or more. (Clicking on the percentage value at the bottom of the filter reverts it to 100%.) You can speed the efficiency of the filter up by making a small selection before you open the Reduce Noise filter (Figure 7-16). Determine your Reduce Noise filter settings, then select OK and close the filter. Undo the effect of your filter on your selection (Cmd/Ctrl-Z), then deselect your selection, (Cmd/Ctrl-D). Select Filter > Reduce Noise (Cmd/Ctrl-F) from the menu bar. Your Reduce Noise settings will now apply to the entire image. |
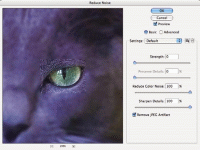 Figure 7-16 |
| This next image shows the default settings (Figure 7-17). These settings are a good place to start. (If you change these settings, the next time you open the filter the new settings will replace the default ones.) If the default settings aren't satisfactory, I suggest taking the following steps. |
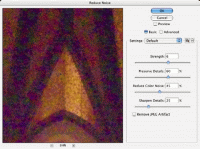 Figure 7-17 |
| 4. Start by setting the Strength value to 0. Slide the slider to the left, or enter the value in the box. This turns off luminance noise reduction, leaving you only with chromatic noise reduction. (Preserve Details, which is tied directly to the Strength value, will not be an option when Strength is set to 0.) Leave Sharpen Details set to 25% for now (Figure 7-18). |
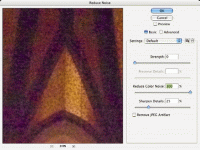 Figure 7-18 |
5. Experiment with different Reduce Color Noise values. Since this works only on the chromatic channels, this should not affect details of your image, only its colors. With the example shown here, nothing I did with Reduce Color Noise, even setting it to 100 percent, helped noticeably.
| 6. If Reduce Color Noise isn't enough, I suggest you set Strength, which works on the luminance (brightness) channel, to 10, its full value. Set Preserve Details to 0. The effect should be quite obvious, and image detail will surely suffer. (Mac users: withhold your judgment until the flashing bar below the percentage number stops signaling completion of processing. This can take some time depending on the size of your image or your settings. This won't be an issue for most Window users.) (Figure 7-19) |
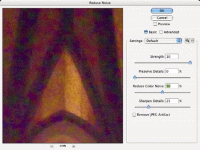 Figure 7-19 |
| 7. Now you have a choice: either dial the Strength value back, or increase Preserve Details. These two settings are related. Preserve Details simply provides parameters for Strength to work within, telling it to ignore (0) or preserve fine detail. After some experimentation, I came up with the proper combination of Strength and Preserve Detail to get what you see here (Figure 7-20). |
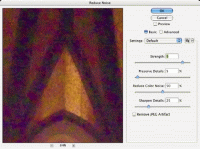 Figure 7-20 |
8. Try selecting Remove JPEG Artifact. Sometimes it helps, even when you are working with a RAW image that theoretically isn't compressed. (RAW data can be saved with compression, and sometimes you just don't know whether its has been saved this way.)
[previous][next]
URL:


 Find a programming school near you