Look Ma ... No Pixels 2 pg 4: Production Graphics with Wendy Peck at webreference.com
 |
Look Ma ... No Pixels 2: Editing Curves and Nodes | |
| I have been promising to take you to node edit since I started this article. Well, finally, we are here. There was method to my madness, however. If you are not completely comfortable working with vector shapes, you are going to be drowning in minutes once we start on nodes. Not that they are difficult once you know vectors, nodes are easy. But you would have a heck of a time trying to work with nodes, if you have not checked "Create as Vector" when creating your shapes. | ||
|
|
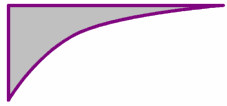
What are Nodes? The exciting thing about nodes is that they can be moved to change the shape of the object. In the case of curves, nodes also control the shape of the line segments. See the sample of a bezier line to the left. The control handles that come from the selected node can be moved to change the shape of the line. It is this feature that gives you so much flexibility with vector shapes. |
|
|
|
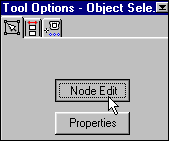
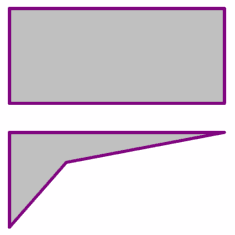
Editing Nodes In the Tool Options window, click the Node Edit button. Your rectangle will change to an outline (the fill and stroke disappear) and the nodes for that object appear. Now click on a node and move it. Here, I have taken my lower right node and moved it toward the top left, forming a completely new shape. The original shape with the node edited shape is shown below. If you haven't worked with nodes before, your imagination should be starting to take off a little with the possibilities. But wait, there's more! You can add more nodes and change the nature of the line segment as well. |
|
|
|
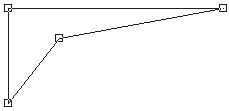
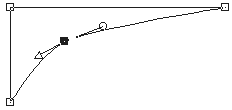
Suppose this is the general shape that we need, but the inside line should be a smooth curve? We can do that. There is actually a shortcut to that task, but let me step you through it the long way to make sure that you really understand what is happening as you edit the node. When working with vectors, you must always keep in mind that there are two types of lines, known as curves and lines. Curves have curves, or control points, as shown in the sample at the left. Lines do not have control points. This becomes important when we wish to reshape objects, since we often have to convert lines to curves or curves to lines to accomplish the necessary effect. |
|
|
Node has lines on either side.
Lines are converted to curves.
Node is converted from Cusp to Symmetric for a smoother transition over the node.
The final result. |
Converting Line Segments and Node Types In Node Edit mode, right click on the node that we moved ... the one in the middle of the diagonal line. Select Node Type and Curve Before. That will change the line that appears before the node into a curve. Right click on the node again, choose Node Type and Curve after. You now have a curved line on either side of the node. Click on the node to confirm that it looks like the lower sample at the left. It is still not perfect, though. We want a smooth curve and this one still retains the same shape as when it joined two lines. Once again in Node Edit mode, select the node that you wish to convert, right-click the node and select Node Type> Symmetric. This setting will force the control handles on either side of the node to equal lengths, which assures a smooth and balanced line. You can also achieve a smooth line by choosing Asymmetric, which keeps the line over the node smooth, but allows the control handles to be different lengths, giving more flexibility in the final shape of the line. As we entered this topic, I mentioned that there was a shortcut to accomplish the same effect. Now that you have converted lines to curves, and node types, I can reveal the easy way. Going right back to when we had just moved the node on the rectangle to create the new shape, right-clicking on the node and selecting Node Type>Symmetric would have accomplished the same thing. In order for the node to be converted to symmetric, i.e., controlling two curves, PSP would convert the lines to curves automatically and take us to the end point in one click.
|
|
|
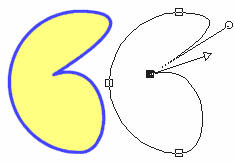
Circle converted to shape with cusp node editing. |
Editing Nodes
|
|
|
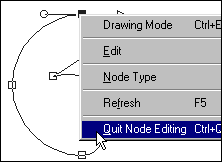
Right-click menu for node editing. |
When working with nodes, it is a good idea to become familiar with the right-click menu options. You can right-click any object with the Vector Selector tool active, and easily select Node Edit. Also, right clicking on nodes will provide a menu will all the choices you need for node and curve/line editing. Carry on to the next page where we will add a few tools like adding and deleting nodes, and finally take a peek at vector text as editable vector curves and nodes. A lot yet to come ... |
|
Look Ma ... No Pixels 2: Tutorial IndexPaint Shop Pro Paths |
URL: https://www.webreference.com/graphics/column46/
Created: April 30, 2001
Revised: April 30, 2001





 Find a programming school near you