Fireworks Effects pg 4: Production Graphics with Wendy Peck at webreference.com
 |
Fireworks Effects: Adding Live Effects | |
|
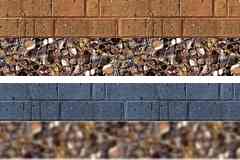
Default Pattern fills in the top set are adjusted using the Effects panel for the lower samples. |
Up to this point, we have been using Fireworks as a Vector program (the patterns and textures are raster fills, of course). However, you can also create new looks for your vector fills with the Effects panel. Here you will find raster tools like blur and sharpen, as well as shadows and bevels. Staying with our Brick and Aggregate samples, this time I have take the default (top set) fills and changed the bricks to a dark gray with the Hue and Saturation effect. I have also used a Gaussian Blur to remove the defined edges of the Aggregate pattern fill. | |
|
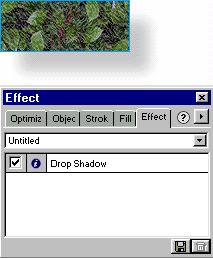
Drop shadow effect applied to a selected object. Details for the shadow are shown below.
|
If you have used a raster program like Photoshop or Paint Shop Pro, this section will sound familiar. Although the Effects panel offers raster effects, your objects are still vector, with all the freedom to move and position that comes with vector objects. (See Graphic Underworld: Behind the Pretty Pictures for a look at vector and raster formats.) You can apply Effects to solid, texture or pattern fills. Of course, when working with solid colors, some effects will not show. To add Effects to your objects, make sure the object is selected. Click on the Effects tab to activate the Effects panel. Click on the drop-down list to open and choose the effect that you desire. The sample at the left shows the Drop Shadow effect in use. When you click on an effect, the default value for that effect will
be applied to the object. You can edit the values in the menu that is
presented. Note: Most of you will be quite comfortable using a drop-shadow, but make sure that you are creating realistic shadows. Although not a specific tutorial for Fireworks, you can pick up some useful pointers for better shadows with Into the Shadows. Also, have some fun with colored shadows, which can add a very realistic glass look to an object. Simply click the color well in the Drop Shadow editing screen. |
|
|
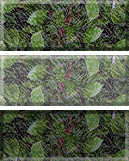
Three button states automatically created in the Effects panel. Raised, Highlighted and Inset samples are shown here from top to bottom.
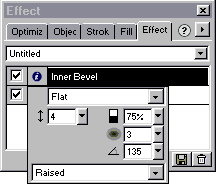
Effects settings for the text shown at the right. |
With the Effects menu, you can also add bevels to create buttons for your site. Fireworks includes four preset states that will let you quickly create the buttons you need for rollovers. The sample at the left shows three different states for a button, created by choosing the Fireworks defaults of Raised, Highlighted and Inset. To add a bevel, make sure your object is selected. Select Bevel and Emboss from the drop-down list in the Effect panel. Select the state from the drop-down list at the bottom of the Effects editing menu. I strongly recommend reducing the default Width value to a smaller value to create a more believable button.
Experiment with the Effects available in Fireworks. The options are
endless if you let your imagination take off. Practice is very important
when you have so many options. |
|
|
Finally, once you have created the look you want, you can save it and create new graphics with the same capability at a later date. In the next section, we will cover creating a style with out images for future use. Read on. |
||
Fireworks Effects Tutorial IndexFireworks Effects: Choosing is the Hard Part |
URL: https://www.webreference.com/graphics/column40/
Created: December 24, 2000
Revised: December 24, 2000


 You can
add several effects to each object in the Effects menu and the effects
are not restricted to rectangles and circles. Any of the effect described
here can be added to text, with the text remaining editable. See left
for the Effects values for the image shown above.
  We
could make this one text sample into many variations using just the
Effect menu. The image included to the right is exactly the same as
the one above, but the Hue and Saturation has been changed. If you look
closely, you can see that the pattern is the same, even though the colors
are so different.
  Find a programming school near you