Paint Shop Pro Layers pg 4: Production Graphics with Wendy Peck at webreference.com
 |
Paint Shop Pro Layers: Vector Layers | |||
|
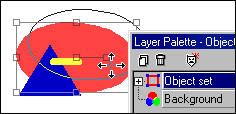
Objects can be selected and moved, even when they are on the same layer.
Objects are listed individually on a vector menu. Object parameters can be changed with a double click.
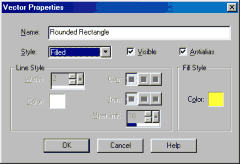
Change vector object parameters with the Vector Properties window, available through a double click on any object in a vector layer. |
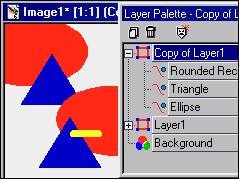
The creators of Paint Shop Pro presented a great timesaving feature when vectors were added, but often "raster comfortable" designers do not take advantage of all the vector benefits. 'Tis a pity since vectors add a completely new dimension to raster work. And it is especially nice to be able to create, resize and position graphics while they are in vector format, and then, with one click, transform the layer to raster format to receive texture and dimensional effects. Note the layer setup in the top sample at the left. There is only one layer that contains objects. The background layer is simply filled with white. Pay attention to the selection borders around the ellipse. Note how the selection does not include the triangle or the rounded rectangle. Also, the circle is moving, as shown by the circular outline and Move cursor. There is no limit to the number of objects you can have on one layer, and they will remain as separate objects as long as the layer remains as a vector layer. All vector objects are noted in the vector layer individually. If you have more than one object on a layer, a + appears beside the vector icon to the left of the layer name. Click on the + and the you will see that the objects are each on their own "sub-layer." (I put the word sub-layer in quotes, since the object listings do not have any layer qualities, but organizationally, listing the individual objects forms a layer-like structure.) It is certainly easy to manage multiple objects on a layer, and this feature is ideal for organizational challenges like navigation bars. Click and drag any object listing above or below other object listings to change the order on the layer. You can also drag an object from one vector layer to another vector layer. The object is moved to the new layer. Double clicking on any object listing in a vector layer will present the Vector Properties menu. You can control fill, outline, antialiasing of existing objects from this window, as well as that object is visible. When you are not working on the layer, you can click the + to collapse the object listing. |
|||
|
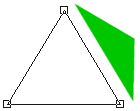
Change a triangle like the blue one in the top sample, to a freeform shape with node editing.
|
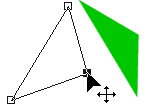
Change a vector shape The set shapes in Paint Shop Pro are great, but what if you do not need a nice, tidy, balanced triangle, like the blue one at the left, but require the green shape instead. Not a problem with node editing, the vector format's true claim to fame. Select a vector object. Right click and choose Node Edit from the popup menu. An outline of the object will appear, with tiny rectangles, or nodes. These nodes can be moved independently to create freeform shapes. Click and drag on a node to move it. CTRL click to add a node as in the image below on the right. When the shape is as you desire, right click again and choose Quit Node Edit to return to the regular object controls.
I am not going to go any further with this discussion, since this is a layers article, not vector drawing. But I hope this will give you an idea of how to work with nodes, an inspire you to experiment on your own. It is a powerful feature ... assuming you like artistic freedom, of course. |
|||
|
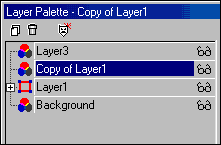
The expanded vector layer from the previous sample has been converted to raster format. Note that the icon now indicates that the layer is raster format, and the + has disappeared. |
Convert to raster format Simply right click and choose Convert to Raster from the popup menu. The object "sub-layers" will be collapsed and the objects combined into a pixel based layer. This conversion cannot be undone at a later time, so make sure that you have all the objects in final form before converting. Your vector layer is now no different from one that started out as a raster layer. Let's add some special effects to our layers. |
|||
Paint Shop Pro Layers Tutorial IndexPaint Shop Pro Layers Start |
URL: https://www.webreference.com/graphics/
Created: August 30, 2000
Revised: August 30, 2000




 Find a programming school near you