3D Animation Workshop: Lesson 69: MAX NURBS--The Piston Project
|
|
Lesson 69 - MAX NURBS--The Piston Project - Part 1
If you've been following the series of lessons on NURBS in 3D Studio MAX, you're prepared to look at the process of building a complete NURBS model.
I've been collaborating with Dino Giannini, one of our outstanding talents at Cogswell College, on a model of a piston from an automobile engine. This is a perfect study in NURBS modeling because of its very sophisticated curvature, varying from sharp edges to subtle contours. We'll take the project about halfway in this lesson and finish it in the next.
First a warning. This is not a tutorial. With all the tweaking, there were well over a hundred individual steps involved in getting model as far as you'll see here, and I won't be giving you the "blow-by-blow." Rather, we'll be looking at the big picture, the strategy of building the model from surfaces and trims. Developing this kind of strategic thinking is critical to NURBS modeling, and not just in the way its important in modeling generally. NURBS modeling involves complex dependencies between the curves and surfaces that both assist you and constrain your choices. If you don't proceed in the correct order, you'll find yourself tangled in a web of dependencies that will have you pulling your hair.
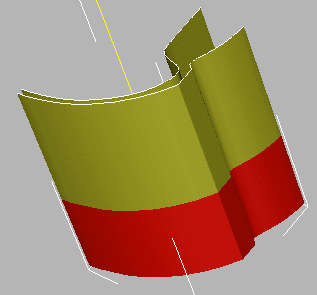
This is the lower portion of the piston (without the rings), turned upside down for easier modeling. Every separate surface has been assigned a separate color (a separate sub-material in MAX). This helps to you understand how it was constructed, but also indicates how textures can be applied. Each surface can be texture mapped separately, and this will become an important factor in how you construct surfaces in the modeling process. For example, the entire inside is made from a single surface because it will carry only a single texture.
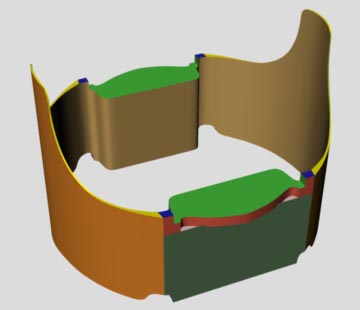
Always look for the smallest possible unit that you can model effectively. In this case, it's one-quarter of the piston.
Our strategy will be something like this: Create two curves to define the shape of the outside and inside surfaces, and extrude both of these into outside and inside surfaces. Then use trim curves to define the vertical profiles of the surfaces. After that, we can connect the outside and inside surfaces at the bottom and top to close up the object. We'll see how this works without adding all the details just to get some confidence, and if it works, we'll go back to the beginning and rebuild with greater detail. This is an important methodology in modeling generally. It's often necessary to test strategies in simple ways before tackling the full project.
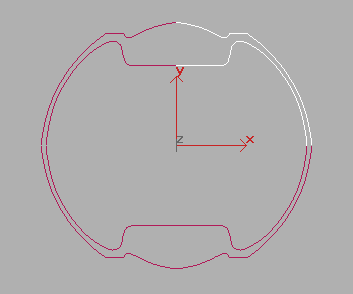
Here's a top view of the curves defining the inside and outside surfaces of the piston.
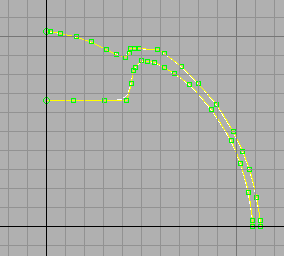
The reason that we can align four quarter pistons into a single seamless unit is due to the control vertices on the ends of both of these curves. If the last two CVs are in an exact line, the result after mirroring will be three CV's in a straight line across the join. This line creates a tangent across the join, so that the curves (and therefore the dependent surfaces) have perfect continuity.
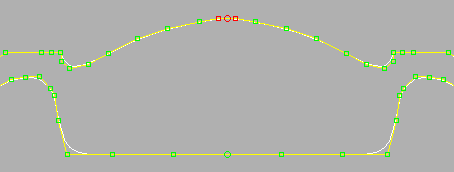
We first extruded surfaces down from the two curves. As an experiment with MAX 3's new Surface Edge curves, we did this in two stages. First, we extruded from the original curve to create a surface. Then we created a Surface Edge curve at the bottom of that surface and extruded that one down further for a second surface.
| To Continue to Parts 2 and 3, Use Arrow Buttons |
|
Created: June 21, 1999
Revised: June 21, 1999
URL: https://webreference.com/3d/lesson69/
 Find a programming school near you