3D Animation Workshop: Lesson 67: Basic MAX NURBS Patches
|
|
Lesson 67 - Basic MAX NURBS Patches - Part 1
Let's get visual.
In our previous lessons on MAX NURBS, we've been focusing on the technical side of things. This is a huge and essential subject, to be sure. But I'm not sure that the more difficult side of NURBS isn't the creative one. It takes an enormous adjustment to begin to conceive of surfaces defined by networks of curves, and of models constructed by assembling of such surfaces.
Take the individual NURBS surface. Until you understand what can be done with a single surface, it can't make sense to plan the development of a multi-surface model. Let's move rapidly through a lot of possibilities in a way that will, hopefully, provide both structure and a sense of the possibilities.
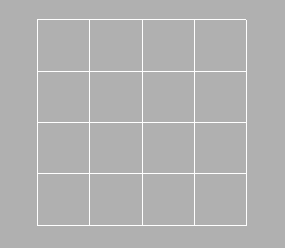
The simplest NURBS surface is a rectangular grid.

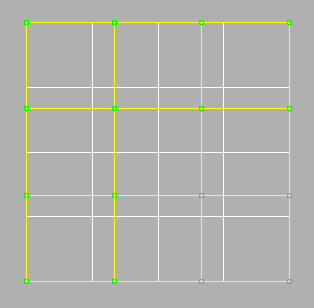
The four isoparametric lines in each direction reveal the general structure of the surface. They are for display only, however, and do not indicate where control vertices (CV's) are available for editing the surface. If the CV's are displayed, we can see that the rows and columns of control vertices do not necessarily line up with the isoparametric display lines.

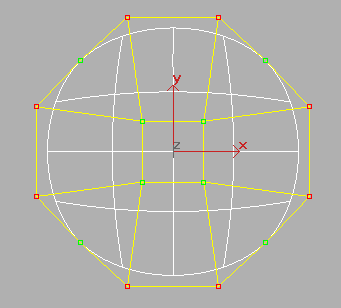
The borders of the surface are NURBS curves, so they certainly don't have to be straight. By selecting CV's along the edge and scaling, we can create a circular surface.

But how useful is this structure if we want to do further editing? The CV's are not arranged in a structure that makes sense for adding detail. We could adjust them into straight rows and columns, but even that might not make much sense. A completely different approach to a circular surface might be necessary.
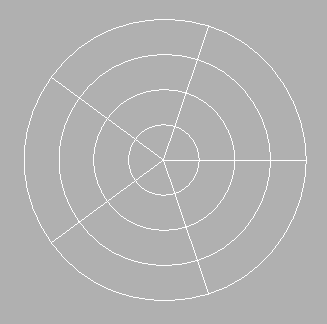
Take a circular NURBS curve and make a copy of it. Scale the copy down to zero size in the very center of the circle. Then loft between the two curves. The result is a radial surface or radial "patch." NURBS surfaces are often called "patches" and we'll use both terms here.

This is a completely different structure than our previous circular patch. In the previous one, the surface was built of open curves in both directions. In the radial patch, the curves in one dimension are closed and the curves in the other are open. In the previous patch, the perimeter of the circle was composed of four separate isoparameteric curves (u=0, v=0, u=maximum, u=maximum). The radial patch, however is bordered by a single curve.
| To Continue to Parts 2 and 3, Use Arrow Buttons |
|
Created: May 25, 1999
Revised: May 25, 1999
URL: https://webreference.com/3d/lesson67/


 Find a programming school near you