3D Animation Workshop: Lesson 56: Surface Suite for Professional Texturing
|
|
Lesson 56 - Surface Suite for Professional Texturing - Part 1
In the last two lessons we covered the basics of texture mapping. The standard texture projection tools work well enough when we are applying bitmaps to flat or highly regular surfaces. But when we need to apply images to irregular or subtly curving surfaces, the process can be very frustrating. Sometimes it may be necessary to divide images up into smaller units to be applied separately to adjacent regions, but this method is tedious and often disappointing.
Some applications, most notably 3D Studio MAX, have tools for tweaking the texture coordinates on a model. We saw an example of such a tool in Cosmo Worlds in Lesson 54. These u,v editing tools allow the user to realign the correspondence between the vertices on the model with pixels on the image, and are great as far as they go. But this kind of editing is difficult to do, especially with denser geometry, because even small edits may require precise adjustments for many vertices.
Sven Technologies has developed a breakthrough approach to texture mapping with their Surface Suite products that seems certain to represent the future for professional-level texturing. Surface Suite is available in two versions at present. Surface Suite for MAX sells for $495 and fits directly into 3D Studio MAX. Surface Suite PRO is a standalone version for use with all applications, and runs $595. If you use MAX exclusively, the MAX version is the best choice because the integration is seamless. The Surface Suite "Texturizer" modifier is simply used in place of the regular texture projection modifier, and a new MAX material is added to implement Surface Suite's ability to layer multiple textures. The standalone version of Surface Suite works by importing models for texturing, and then exporting either the textured model or a bitmap that can be easily applied to the model in the rendering program. Sven plans to release LiveLink extensions for direct integration of the standalone version into the major 3D packages and Photoshop.
The key to Surface Suite is a technology called Adaptive Image-based Surface Texturing (AIST) which permits an artist to use existing imagery, especially photographic images, for texturing. A great deal of realistic texturing relies on photographs of the desired materials, and this technique is easy when the surface to be textured is flat or highly regular. Surface Suite takes the next step by permitting realistic source images to be adaptively fitted to irregular surfaces. The best example, and the one used in the Surface Suite tutorials, is mapping a photograph of a human face to a 3D model. The tutorial example (for the standalone version) uses a polygonal model of fairly high density, so I decided to try it out on two different, and very important alternatives--a low-poly, real-time version for use in Lightwave and a NURBS version for use in Softimage.
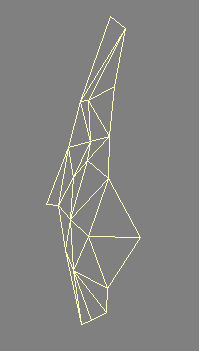
First I created a low-poly head in Nendo and exported it to Lightwave. In Lightwave Modeler, I tweaked it a bit and removed everything but the face. The model is fully triangulated (which accounts for the diagonal edge across the flat of the nose).


I used the following photograph of "John" provided in the Surface Suite tutorial. Notice how the basic shape of his head only roughly corresponds with that of the model.

| To Continue to Parts 2 and 3, Use Arrow Buttons |
|
Created: Dec. 22, 1998
Revised: Dec. 22, 1998
URL: https://webreference.com/3d/lesson56/


 Find a programming school near you