3D Animation Workshop: Lesson 53: Nendo--Curves Without Splines
|
|
Lesson 53 - Nendo--Curves Without Splines - Part 3
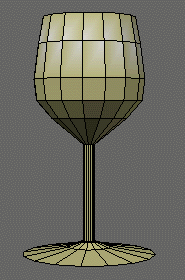
Let's take our improved glass (from the right) and give it some class by translating up the top face and scaling it in.

For more curvature, we add a single row of edges beneath the top row. This is achieved by selecting the top row of vertical edges and applying the "connect" tool. Then we select all the points above the stem. This easy in Nendo. Just select the top face and then use the vertex selection hot key ("v") to grab the adjacent points. Repeat until you have them all. These selection tools are sure to be copied by the competition.

The "tighten" tool is absolutely unique, and absolutely amazing. As we move the mouse the selected points are redistributed for rounder curvature. And this at the cost of absolutely no additional polygons! I just can't get enough of this tool.
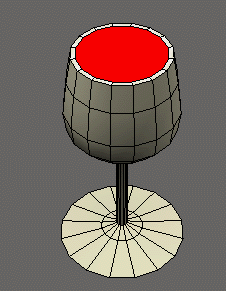
We're happy with our shape, so it's time to clean up. The bottom face is just one 16-sided polygon. Getting it triangulating took a little thinking. First we inset the face as much as we can. Then we select the tiny 16-sided polygon squeezed into the middle, use the "e" key to select its edges, and then collapse those edges. This creates a ring of triangles all joined at a single point.

The inside surface is created by insetting the 16-sided polygon at the top to define the lip of the glass.
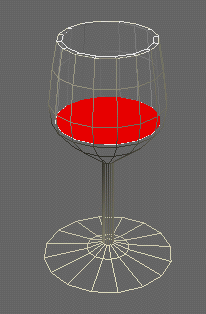
We can now extrude down in stages, scaling at each step to match to contour of the outside. But we can probably get away with fewer stages, and therefore fewer polygons. A wireframe view is necessary to work inside the object.
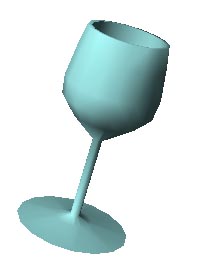
Exported into Lightwave and fully triangulated, our finished goblet is only 382 triangles.
| To Return to Parts 1 and 2, Use Arrow Buttons |
|
Created: Nov. 10, 1998
Revised: Nov. 10, 1998
URL: https://webreference.com/3d/lesson53/part3.html
 Find a programming school near you