3D Animation Workshop: Lesson 52: Low-Polygon Modeling | 2
|
|
Lesson 52 - Low-Polygon Modeling - Part 3
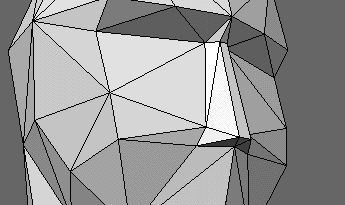
The ridge of the nose is sharp, so what will it cost to flatten it out? Exactly four triangles--bringing our face count up to 102 triangles. Can you find the additional triangles. If you only find three, it's because I didn't draw the necessary diagonal across the quad on the nose. As this edge would not (unfortunately) add any additional detail, I left it out so that the geometry of the nose is more readable.
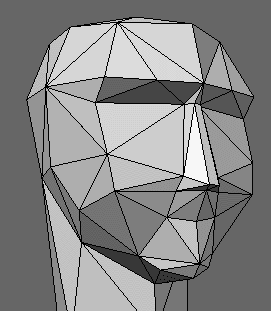
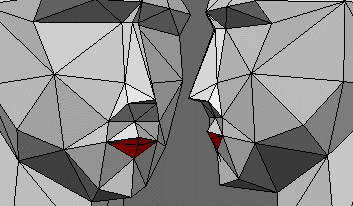
If we divide the two edges running through the eye areas, and connect the points up, we can now punch in the central points to create eye sockets. This is a big improvement for only four additional triangles. Total: 120 triangles.
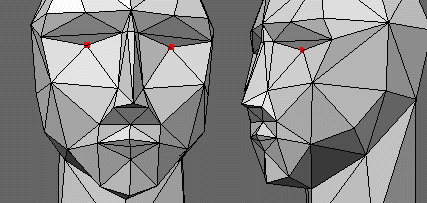
This is pretty good for a very angular face, but with a little further reorganization, we can create a rounder, perhaps more feminine look. At the net cost of two additional triangles, we trade definition at the chin for more on the cheeks.

The final model is therefore 122 triangles. But looking at it in this flat-shaded, wireframe form is misleading. If the model is intended for real-time use, such as in a game, we need to see it smooth-shaded in its true environment. A good quick test is to export it to VRML (yes, Nendo does this) and look at it in Cosmo Player. A touch of vertex color in the lips and eyes (Nendo can do this, too) helps.
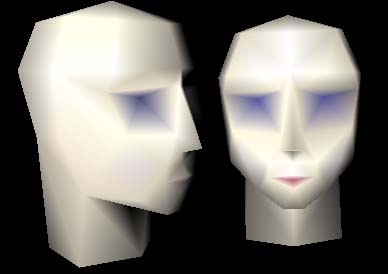
This model has all the geometry it needs. With a custom texture map to paint the features, it'll look great.
| To Return to Parts 1 and 2, Use Arrow Buttons |
|
Created: Oct. 27, 1998
Revised: Oct. 27, 1998
URL: https://webreference.com/3d/lesson52/part3.html


 Find a programming school near you