3D Animation Workshop: Lesson 51: Nendo--Innovation in Modeling
|
|
Lesson 51 - Nendo--Innovation in Modeling - Part 2
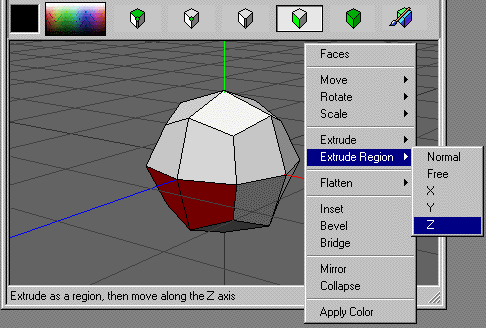
We now can select a couple of faces (note the selection mode in the toolbar), and a right click gives us the appropriate editing options. We want to extrude these faces out as a unit, as so we choose "Extrude Region" in the z direction. Note the red, green and blue coordinate axes for guidance.
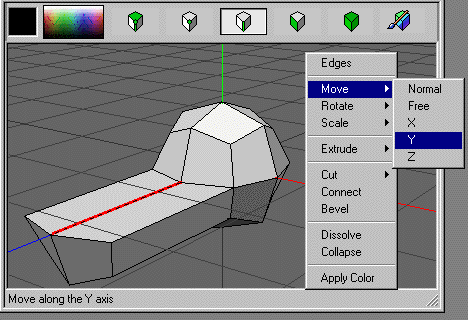
After extrusion, we switch to edges mode and select an edge. A right-click gives us our editing choices, and we decide to translate (move) the edge up vertically.
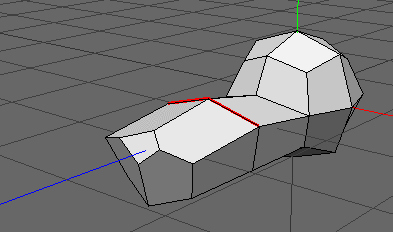
Next we switch to point mode and select a point. Our editing choices for points include a remarkable bevel option, which creates a face out of a point.

The next image adds a few edits at once. The point at the nose has been beveled into a polygon. A new set of edges has been added that bisects the muzzle, and the top ones have been translated up. Translations are remarkably easy because you can choose between movement along the world coordinate axes, movement in the direction of the normal of the element (as here), or even unconstrained "free" movement.
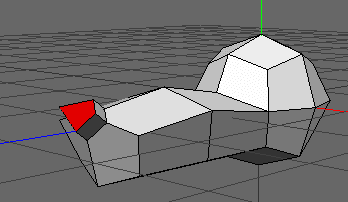
We can start moving more quickly now. We extrude out the newly beveled face to create a nose.
When an object (like a head or a car) is bilaterally symmetrical, the standard procedure is to work on only half the model. This saves time and prevents discrepancies between the two sides. Nendo actually makes it easy to work on both sides at once, but we'll stick to the standard procedure and cut the object in half. (The odd dark gray face is a display artifact and can be ignored).
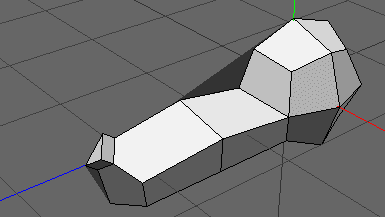
To create nostrils, we select the appropriate face, and inset a face within it.

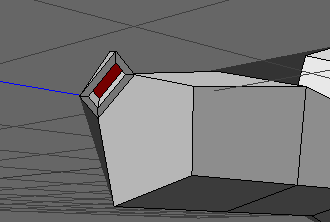
The inset face can then be extruded inward and scaled down a bit.
| To Continue to Part 3, or Return to Part 1, Use Arrow Buttons |
|
Created: Oct. 13, 1998
Revised: Oct. 13, 1998
URL: https://webreference.com/3d/lesson51/part2.html


 Find a programming school near you