3D Animation Workshop: Lesson 35: Softimage--Starting With Splines
|
|
Lesson 35 - Softimage--Starting With Splines - Part 2
Polygonal geometry that is heavy (dense) enough to support smooth curvature is inherently difficult to edit in a way that maintains that smoothness. For example, if we pull out a single vertex we get a very sharp spike.
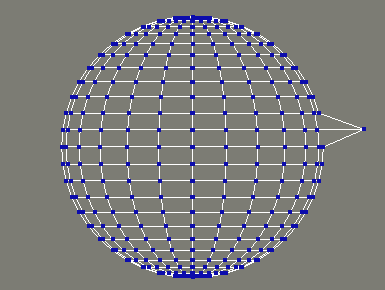
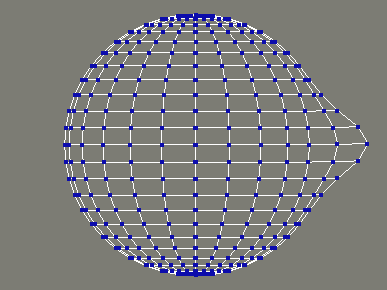
Pulling lots of points independently to maintain curvature is difficult, so every polygonal modeler provides some kind of tool that allow the user to shape the mesh with a kind of "falloff" effect. In Lightwave there are the Dragnet and Magnet tools. In MAX there is the "Affect Region" option. And Softimage has the "proportional modeling" mode. When proportional modeling is activated, dragging a point will also cause neighboring points to move in a way that preserves curvature.
Note the difference when the same vertex is translated, but with proportional modeling in effect.
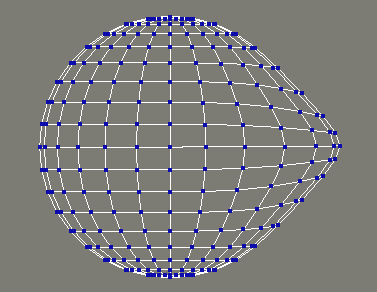
These kinds of mesh editing tools are very effective and important in creating organic shapes, but the screen is cluttered by the dense mesh and cloud of points. What if we could create the same sphere directly out of curves. Like this.
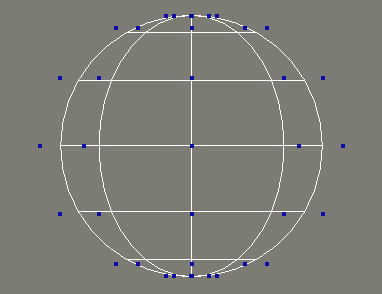
The sphere made out of splines can be shaped with relatively few control points. And translating a single point changes the shape of the curve, but maintains the curvature.
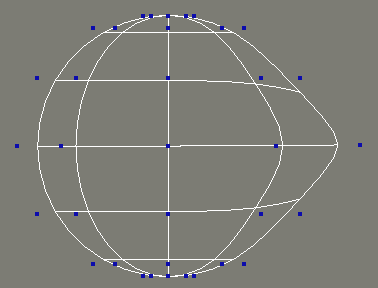
It's typical to speak of a spline "cage" in contrast to a polygon "mesh." The reasons for this usage will become clearer as we go along. But it's enough right now to understand the basic concept. By modeling using splines, we can maintain curvature in our models while limiting the number of points necessary to edit. The blue points in the wire frame are called control points or control vertices. Anyone who has ever used Bezier curves in 2D graphics programs already understands how control points are used to shape a curve. But Bezier splines, with their distinctive handles, are not the only kind of spline. In 3D graphics, the more sophisticated B-Spline and its big brother the Nonuniform Rational B-Spline (or NURBS) takes center stage. Both NURBS and B-Splines are distinguished by control points that do not lie on the curve itself. In the NURBS sphere we have been using here, note how the control points float above the surface of the object.
Before going any further, let's make sure we understand something clearly. The spline itself is a mathematical ideal, but a rendering engine understands only a polygon mesh. Therefore a spline cage is automatically tessellated into polygons for rendering. The process is transparent to the user, but if we want, we can explicitly convert our spline object into a polygon mesh and see what the rendering engine will see.
| To Continue to Part 3, or Return to Part 1, Use Arrow Buttons |
|
Created: March 3, 1998
Revised: March 3, 1998
URL: https://webreference.com/3d/lesson35/part2.html
 Find a programming school near you