3D Animation Workshop: Lesson 18: Light, Shadows and Feelings | 2
|
|
Lesson 18 - Light, Shadows and Feelings - Part 2
With these esthetic considerations drilled in, let's return to practice.
Lighting will be nearly always be some combination of specific light sources and AMBIENT LIGHT. In most physical environments, a great deal of the lighting is produced by random bouncing off of surfaces. Objects out of the path of direct light sources are rarely completely dark, and the light they receive is the composite of a seemingly infinite number of reflections. As the ambient light has no coherent direction, it produces neither shading across the surface of objects, nor causes objects to cast shadows onto other surfaces. High-end, specialized rendering engines, such as Lightscape, produce very high quality ambient effects using a technique called "radiosity." Radiosity calculations can create extremely convincing interior scenes by actually evaluating the effect of light reflecting off the surfaces in the scene. However, standard renderers fudge the effect of ambient lighting by simply adding a lighting value to all pixels in the image.
Let's strip away the light sources in our scene, and leave only the ambient light--set unrealistically high so that the scene is well illuminated.
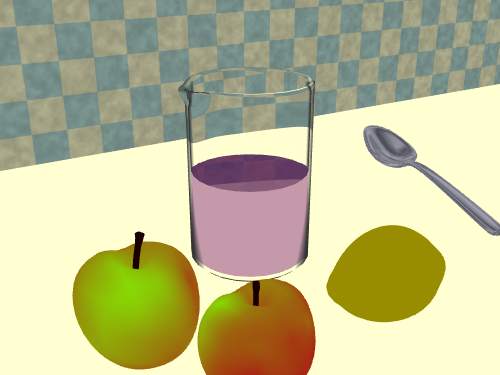
I know it's ugly, but there's a lot to learn here.
Notice first that, as mentioned above, there are neither shadows being cast on the table nor shading across the surface of the objects. Here is the final version again for comparison.

The mottled shading on the surface of the wall has remained, but this was a trick--and a trick worth understanding. Had the texture of the wall been created using a BUMP MAP, as the texture of the lemon was, the texture would disappear in absence of any defined light source--just as the texture of the lemon has. But the texture on the wall was created by applying a map to the surface's overall diffuse color response to light, including ambient light. We discussed this technique in Lesson 13. Thus the apparent texture on the wall was created by a grayish pattern mapped over the checkerboard, and remains even when the light sources have been removed.
Another peculiar thing you may have noticed is that reflection pattern on the spoon has remained. There can be no reflections with only ambient light, so, once again, a realistic effect is unmasked as a computer trick. Instead of making the spoon's surface reflective of the other objects in the scene, it was simply mapped with a mottled pattern. The trick works under the circumstances, and saves the rendering time required for true ray-traced reflections. (Don't worry. We'll spend lots of time explaining the meaning of "ray-tracing.")
Let's add the simplest kind of light, a directional light, to the scene and bring the ambient lighting down.
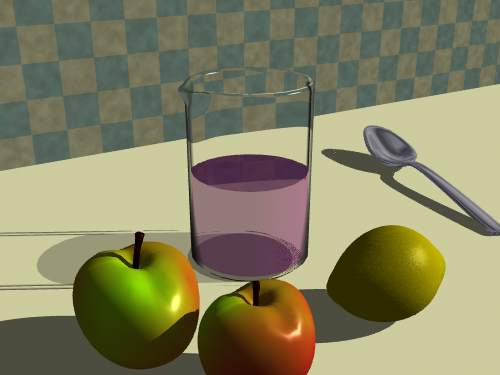
Not an unpleasant scene, really. And most of the touches of photorealism are back. Take some time to compare this image with the final render above to consider what is lacking or disappointing, because this is the very skill that must be learned to develop your own work.
In a word, the scene is flat. It looks quite a bit like the vision of the painter Wayne Thiebaud, and if this is intended, it can be certainly represent a legitimate artistic vision. But we are looking for a richness than expresses an environment. A couple of factors jump right out.
The first is the shadows. They are very sharply defined and much too opaque for the kind of lighting we would expect from the scene. They are the shadows appropriate to bright sunlight in the outdoors, and not to light filtering through a window and bouncing off walls. This result makes sense because that's what directional lighting is supposed to do. All the rays are parallel and pointing in the same direction, just as sunlight does. Notice also what a funny shadow is cast by the glass beaker. The glass itself looks remarkably good, in part because the top rim of the beaker contrasts strongly with the darker wall. But the sharp line for the shadow cast by the glass is the weakest part of the image.
| To Continue to Part 3, or Return to Part 1, Use Arrow Buttons |
|
Created: August 26, 1997
Revised: August 26, 1997
URL: https://webreference.com/3d/lesson18/part2.html
 Find a programming school near you