3D Animation Workshop: Lesson 16: Bevels and Details | 3
|
|
Lesson 16 - Bevels and Details - Part 3
We've sure gone a long time without an animation!

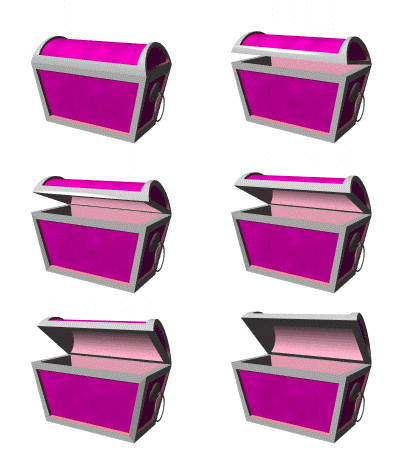
What a difference a little movement makes in selling the perception of 3-D space. We can look at still renders of this chest all we want, but when we see it opening and closing the feeling of a real object occupying space just gels--even in a tiny clip like this.
To create this animation, the separate lid and box objects were arranged together such that the lid sits directly on top of the box. The lid is then PARENTED to the box. This is not directly evident in the animation, but it makes sense. If we move or rotate the box, the lid should move with it. On the other hand, it would not have been proper to parent the box to the lid. The lid must be able to rotate back freely without moving the box.
Think about the rotation of the lid. The lid must rotate around an axis attached to the top-back of the box. Rotation in 3-D applications is always around a pivot point, and so (once the lid was properly positioned atop the box) I moved the pivot point of the lid to the appropriate location. Once this was fixed, rotation around the x axis (often called "pitch") properly opened and closed the lid. Rotation around the z or y axis was possible in the animation, but not for a real lid on hinges!
Now that I've got that animation out of my system, let's finish up with a look at how the handles were modeled.
Here's a close-up.

From this view you can see another benefit of separate surfaces. Notice how the salmon colored edge is distinctly glossier than the other surfaces. This surface was not only set with a different color, but also with a fairly high degree of specular reflection. Giving edges and details a shiny surface tends to add definition to a complex object.
The ringed handle is fairly simple. The main feature is the ring itself. Rings or other donut shapes--properly called toroids--are almost impossible to model by hand and every program offers them as some kind of PRIMITIVE. The parameters are the radius of the cross-section of the torus and the radius of the torus itself. In this instance, the radius of the cross-section is very small compared to the radius of the ring. For a donut, the radius of the cross-section would be a more sizable fraction of the radius of the torus.
The rounded plate (for lack of a better word) attached to the side of the box was created by squashing down a primitive sphere, and then cutting it in half with a Boolean subtraction object. This was essentially the same process we used to create the lid of the chest in Lesson 15. To connect the ring, I placed a small tube directly against the plate. The tube was created using a tiny primitive cylinder, with an even narrower cylinder subtracted out for the hole. The top of the ring was then carefully placed in the hole.
With the three parts of the handle modeled, some decisions were required. Should these separately modeled parts be merged into a single model, or should they remain separate, the way the box and the lid were handled?
The little tube will never move from its position against the plate. So, although it could be simply parented to the plate, it makes more sense to use a Boolean union operation to merge the polygons of both objects into a single mesh.
The rings are something else. We may wish to lift them up in an animation, just as we did the lid. To keep them free, the rings must remain separate objects, but should be parented to the fixtures. With their pivot points placed precisely where they pass through the tube, the rings can then be rotated realistically on the z axis.

By learning to think this way, we prepare ourselves and our models for the animation process. Even though this only a chest, it has movable parts and a logical integration that make it only simpler, but not fundamentally different from, a robot or a machine.
| To Return to Parts 1 and 2, Use Arrow Buttons |
|
Created: August 11, 1997
Revised: August 11, 1997
URL: https://webreference.com/3d/lesson16/part3.html


 Find a programming school near you