3D Animation Workshop: Lesson 115: Polygon Basics in MAX 4 | 3
|
|
Lesson 115 - Polygon Basics in MAX 4 - Part 3
The selection of Polygons in Editable Poly couldn't be more straightforward. There is no issue of planarity or Invisible edges. The underlying organization of Polygons into triangles is hidden from you (unless you choose to get involved). Click on any of the four quads, and you've selected a quad. How revolutionary!
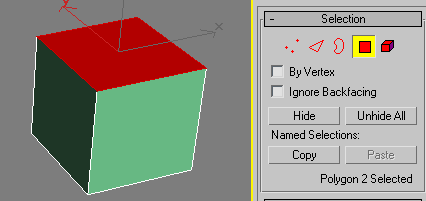
Having eliminating the confusing distinction between a Face and Polygon, you make two triangular Polygons by simply creating a new edge (in the Edge mode) between two of the vertices. It's as simple as drawing a line between them.
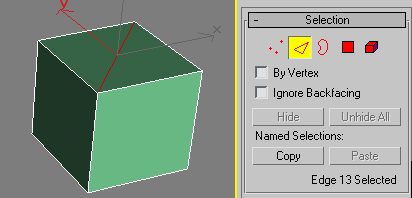
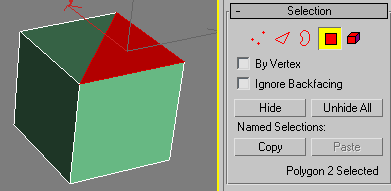
Back in Polygon mode, the new triangles are selectable as Polygons, just as the quads are. Much simpler!
Before leaving the subject of Polygon sub-object selection mode, we should consider the issue of normals. A normal (for our purposes) is a ray that is perpendicular to the plane of the polygon. This ray is used to indicate the renderable side of the polygon. The concept of a perpendicular ray only makes sense for polygons that are perfectly planar. Triangles are, inherently, perfectly planar. Thus in Editable Mesh, it makes sense to be able to display the normals for the Faces in selected Polygons.
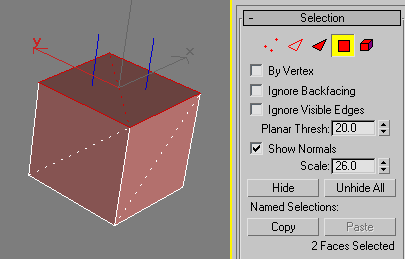
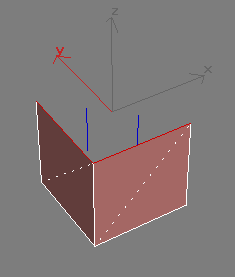
We can then flip the direction of the normals of the selected Faces so they point in, instead of out. The next image can be confusing to read, but note that although the top quad is not rendering, it still exists and its two normals are pointing downward.
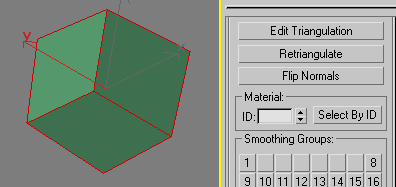
Editable Poly takes a simplified approach that makes sense in the overwhelming majority of cases. Normals cannot be displayed, nor can you flip the normals of selected polygons. You can only flip all the normals of a mesh Element as a group. An Element is a group of contiguous (connected) Polygons. Thus you must go into Element sub-object mode first. In the case of our cube, there is only a single Element to select, compromised of the entire mesh.

After flipping all the normals together, we see the inside surfaces of the cube.
We'll continue with our exploration of the Editable Poly toolset next time.
| To Return to Parts 1 and 2, Use Arrow Buttons |
|
Comments are
welcome
and brought to you by webreference.com
Created: March 27, 2001
Revised: March 27, 2001
URL: https://webreference.com/3d/lesson115/3.html


 Find a programming school near you