3D Animation Workshop: Lesson 100: Character Arms and Legs
|
|
Lesson 100 - Character Arms and Legs - Part 1
I recently heard from Richard Khoo, an outstanding character animator and Cogswell College alum, currently with Jinx in San Francisco. Jinx develops character animation pieces for Web 3D delivery using Pulse technology. (I wrote a few columns about Pulse some months back.)
Richard asked me to look at the Li'l Green Men series now running on the Warner Bros.www.entertaindom.com site. I was very impressed, and suggest that you take a look yourself. Pulse and its allied content developers are betting on a new species of short character-animated pieces delivered over the Web. The idea has always made good sense to me, but many of the examples I had seen up to now had been lacking in graphical quality or entertainment value. Li'l Green Men, however, is solid on both fronts, and the streaming technology that allows these pieces to run comfortably on dial-up bandwidths is very impressive. Li'l Green Men is a big step forward in both Web 3D and Web entertainment content. Check it out.
Speaking of character animation, we've been setting up a simple character mesh in 3D Studio MAX over the last few lessons. If you haven't read the previous columns in this series, you may want to catch up before turning to this one.
We've finished the tedious process of weighting the vertices from the hips to the head, and are now ready for the arms and legs. Let's start with the legs. In my experience, you have to do an entire leg as a unit  thigh, calf and foot. It also pays to work on both right and left legs together to make sure that adjustments made on one side are properly copied on the other.
First, we do the rough work. We adjust the envelope around a thigh to fit as snugly as possible, and then copy the adjusted envelope to the other thigh. You can see the value of modeling with the legs slightly spread. If the legs were close together, as in a normal standing posture, you'd end up with overlapping envelopes, and therefore more vertices to weight by hand.
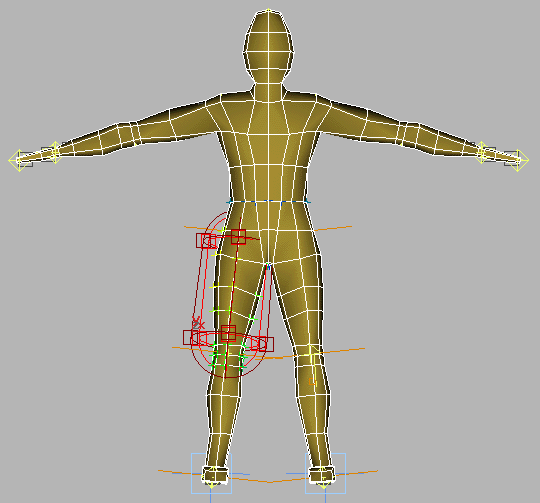
Next, we fit the envelope around the calf, and copy this envelope to the other calf.
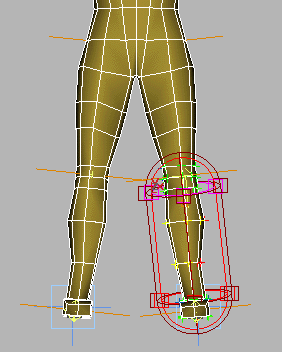
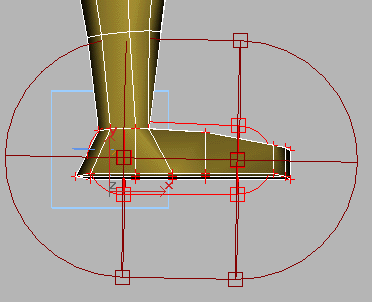
It's not worth fooling with the envelope for the foot. We can safely start by just selecting all the vertices that should be controlled by the foot bone and set them to 100 percent weighting (as indicated by the red color). It's very easy to unintentionally select vertices on the other foot or elsewhere on the mesh, so you've got to be careful.
| To Continue to Parts 2 and 3, Use Arrow Buttons |
|
Created: August 28, 2000
Revised: August 28, 2000
URL: https://webreference.com/3d/lesson100/
 Find a programming school near you