How to Use Advanced Windows Forms | 4
[previous] |
How to Use Advanced Windows Forms
18.2.3 Creating an explorer interface
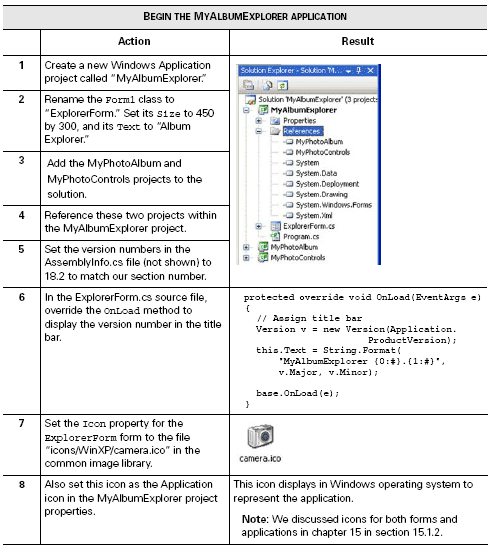
So let's see a tree view in action. The following steps begin a new MyAlbumExplorer project for use in this and the next chapter, as well as show the creation of an explorer-style interface.

This creates our new solution, with the version number displayed in the title bar and a new icon that represents our application. As you may recall, the common image library mentioned in step 7 is our shorthand for the graphics files provided with Visual Studio.
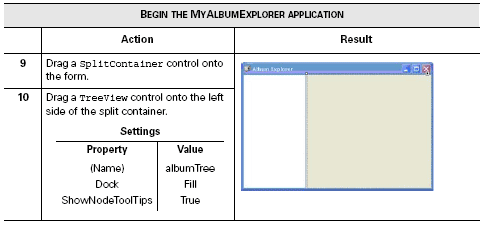
To turn this into an explorer interface, we need to split the display area into two
sections, with a tree on the left and information about the selected tree node on the
right. To do this, we need a SplitContainer and TreeView control, which we
add here so they are available in the next section.

When you add the split container, Visual Studio displays the text Panel1 and Panel2
on each SplitterPanel instance to make them easier to identify. Our application
does not do very much yet, but it does work. The next section discusses how to populate
this tree view with our album data.
Excerpted from "Windows Forms in Action" by Erik Brown. ISBN 1-932394-65-6, Copyright © 2006 Manning Publications Co. All rights reserved.
Created: March 27, 2003
Revised: May 1, 2006
URL: https://webreference.com/programming/winforms/1


 Find a programming school near you