Podcasting with Audacity: Creating a Podcast With Free Audio Software | Page 2
[previoous] [next]
Podcasting with Audacity:
Creating a Podcast With Free Audio Software
Orient Yourself in Audacity
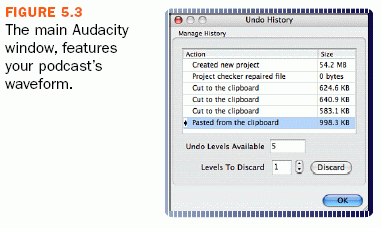
When you first open your podcast in Audacity, you'll see something that looks like Figure 5.3:

The blue squiggly lines you see are called a waveform, and they represent your recorded audio. Basically, the larger a particular squiggle, the louder the audio at that point, with the reverse true as well.
The ruler along the top of the waveform shows the length of the recording; in this case, around 21 minutes. You also use the ruler to select areas of your audio that you want to hear or edit.
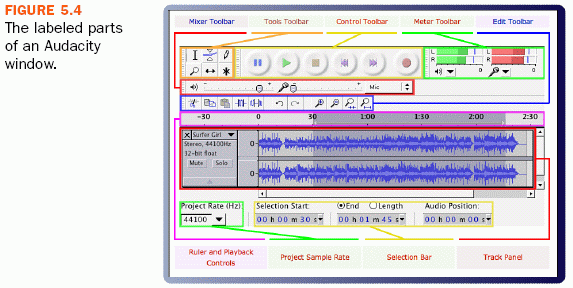
Let's quickly go over the other components of your Audacity window. We've already looked at a few of the interface elements in other chapters, which I will refer to, but there are some new components as well. In Figure 5.4 you can see all the various aspects of Audacity's window, along with labels describing them.
You may see a big difference in the layout of the Audacity you have running on your computer and that shown in Figure 5.4. If so, don't panic. You can move Audacity's toolbars around within the window to best suit your preferred working style; in addition, Audacity automatically moves the toolbars around as you adjust the size of the program's window. It's best if you learn the names of the various components so that you can refer to them by name instead of by position.

The six colorful buttons in the top left of the Audacity window, as shown in Figure 5.5, are the Control toolbar. They should be familiar to you from virtually any digital audio program.

If you need a quick refresher on the purposes of the Control toolbar, take a look back in Chapter 4, "Record Your Podcast," in the section "Recording with Audacity."
The Meter toolbar, displayed in Figure 5.6, was covered earlier in Chapter 3, "Microphone and Speaker Setup," in the "Test Volume Levels" section.

Those meters show you the volume levels of input and output that Audacity hears. The input level is critically important when you're recording, and the output level becomes important as you edit your podcast.
The Mixer toolbar, which you can see in Figure 5.7, was also covered previously, in the "Test Volume Levels" section of Chapter 3.

The two sliders control the volume levels Audacity uses for input and output on your sound card. The left slider, with the speaker in front of it, is for output, whereas the right, with the microphone icon, is for input. To the right of the input slider is a drop-down menu that allows you to select the source of input: microphone, line in, CD/Video in, and so on.
Next to the Control toolbar is a group of six small buttons with various icons on them, shown in Figure 5.8.

This is the Tools toolbar, and it allows you to perform editing functions on your audio file that require selecting areas of your audio.
The Edit toolbar, viewable in Figure 5.9, is useful as you work on fixing up your podcast.
More information about the Edit toolbar can be seen in the Audacity Manual.

Many functions on the Edit toolbar should be familiar to anyone who's used a word processing program. Cut, Copy, Paste, Undo, and Redo should hold no surprises. We'll cover the other buttons and what they do later throughout this book.
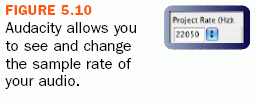
Figure 5.10 shows the Project Rate area of Audacity.

Finally, the Selection toolbar, shown in Figure 5.11, is used to view and change the exact start and stop time of a range of selected audio, allowing you to make precise selections.

You'll use the Selection toolbar a lot as you edit your podcasts; in fact, you'll learn more about it in the next section.
[previoous] [next]
URL:


 Find a programming school near you