Photoshop and PSP Channels pg 2: Production Graphics with Wendy Peck at webreference.com
 |
Photoshop and PSP Channels: Photoshop Channel Basics | ||||
|
If you are interested in channels, and you own Photoshop, you are one lucky designer. Photoshop's professional print roots show clearly when we move into the channels subject. Of course, in software, powerful capability almost always increases the confusion factor as you are learning. Let's take it a step at a time, though, and I am confident you will say, "Is that all there is to it," at the end. The only really tough thing about channels is wrapping your brain around the fact that channels are really not separate, but that they work together to produce the main image. OK, maybe it is a little confusing when you move into masks find them in the same place, but we will look at that, too. Just stick with me to the end. You want this in your toolbox and channels are really so easy. |
|||||
|
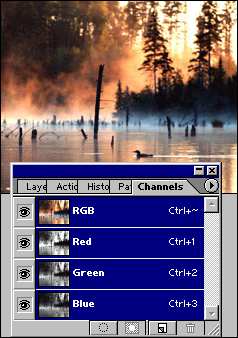
Channels panel active with RGB chosen. This selects all the color channels in the palette. Note that the thumbnails show the view that will appear in your screen when that channel is activated. |
Displaying channels In the view shown at the left, RGB is selected, which automatically selects all channels. When you are working with the full image, this is the selection your Channels panel will show.
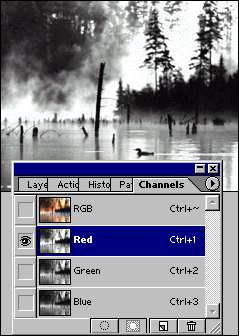
Try it! Select only the red channel in an image. In the main document screen, apply a filter to the grayscale image. Activate the blue or green channel and you will see that there has been no change. Now activate the RGB channel, and you should see an effect, but it will affect only red in the image. Perhaps there will be a pattern showing in red very hard to predict what you will see, but there will be a change if you have used a strong enough filter. |
||||
|
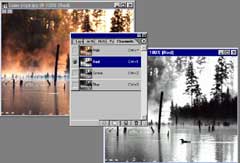
Click here or on the image below to see a larger view of the Photoshop screen. Photos © Tom Thomson Photography. |
Viewing the changes as you work With your image active and RGB channel active in the Channel palette, select View > New View. Another version of the same image will appear in a window on your screen. Of course, both windows are the same to start. But click the red channel in one of the windows. Now you have one window with the RGB view, and one with the red. Try making an adjustment to the red channel window. The red channel view will change, but the RGB window will also reflect the change. Carry on to the next page for more on separating channels but this time we are deadly serious. We are really going to split the channels. |
||||
Photoshop and PSP Channels Tutorial IndexPhotoshop and PSP Channels: What, When and Why? |
URL: https://www.webreference.com/graphics/column41/
Created: January 21, 2001
Revised: January 21, 2001


 Find a programming school near you