Vector Gradient Fills 2 pg 4: Production Graphics with Wendy Peck at webreference.com
|
|
Vector Gradient Fills 2: CorelDraw Blends | |||
|
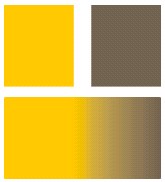
Two identical objects are blended with the Interactive Blend tool for the same result as a fountain fill would provide.
|
A blend is simply taking one object and blending it to another. In it's simplest form, as shown at the left, it is exactly the same as a fountain fill when complete. Here, we have a gold and brown rectangle of the same dimension, exactly in line horizontally. The blend tool is used to join the objects in a gradual color transition ... exactly like a fountain fill. This simple example is excellent for practice, even though it would make more sense to use a fountain fill for this exact look. Draw two rectangles and fill each with a different color. Remove any outline. (Blends usually look best without outlines, though some dramatic effects can be created we are focusing here on using blends as an extra option for a fountain fill look, so will stay away from outlines.)
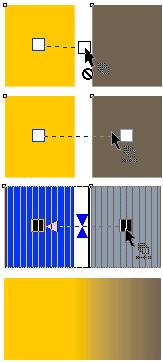
Click and drag from one object to the other. The process that the screen will go through is illustrated at the left. In the first sample, note how the cursor carries a stop symbol. The Blend tool has found nothing it can blend with yet. In the second sample, the stop symbol has disappeared and a second square snaps to the center of the new object. This is telling you that these objects can be blended. (We will learn a little later how to map blend points.). Soon after the Blend tool finds an object to blend with, the display changes to the look in the third sample. This shows the blend steps. Finally, the fourth sample is the completed blend. Again, this is not a place I would use a blend, but it is the best introduction to the way the tool works.
|
|||
|
|
|
|||
|
Different sized objects, as well as any shapes, can be blended for unlimited effects. |
The power of blends really shows when you blend objects of different shapes or sizes, as in the orange and brown example at the left. Not only do you achieve a fountain fill color blend effect, you can also add perspective and true dimension with just a mouse click. To accomplish this look, position objects as shown here and follow the instructions from the previous sample
Try a few different shapes and edits to get used to how the blends work. We are not going deeply into blends this time, since it would take an entire tutorial to cover them properly. However, it is important to understand the basic blends before we move even a little further. |
|||
|
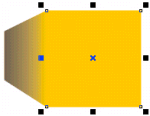
Same blend but with the number of steps changed from 5 in the left sample to 15 for the right.
|
|
|||
|
|
|
|||
|
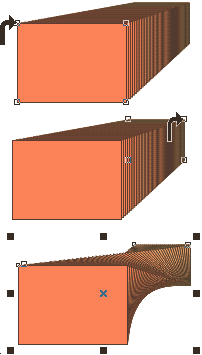
Using the Map Nodes feature to specify which node from each object will be blended. |
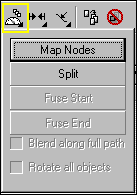
Click on Map Nodes and your cursor will change to a curved arrow and the first object in your blend will have small squares at every node. Click on the node you wish to blend from this object. The second object will be automatically selected as you can see in the second sample at the left. Click on the node you wish to blend on this object, and the blend is completed. For this sample, I have outlined the blend objects so you can track the blend. Note how the top left corner of the front rectangle is now blended to the top right corner of the second rectangle. The final, largest sample here shows the blend without the outline. And that's it for this time with blends. Play a little, try to incorporate them into your next project to build your comfort level. Between fountain fills and blends, your work will come to life. |
|||
|
|
Vector Gradient Fills 2 Tutorial IndexVector Gradient Fills 2 Start |
URL: https://www.webreference.com/graphics/
Created: July 5, 2000
Revised: July 5, 2000






 Find a programming school near you