3D Animation Workshop: Lesson 99: More Character Skinning | 2
|
|
Lesson 99 - More Character Skinning - Part 2
The head should bend from side-to-side, and also rotate in the heading. This is true of the spine as well, but movements of the head are much more important in character animation because they are used to convey human expression. We need to test these out before going on.
Bank rotation is a bit disappointing. The core problem is that the center of rotation is too low in the neck.

What are our options? We could remove the Skin modifier, reposition the joint, put the Skin modifier back on, and redo all the weighting we've done thus far. That's a lot of work. Even when we're done, it's possible that the new position of the joint will screw up the nice forward-backward bending we tested before.
This kind of frustrating and tedious balancing is what character setup is all about. I can't stress this enough. Character setup and animation are not for everyone, but rather only for those who love it so much that they will endure the struggle to make it work. In this case, I'll try to make the best of what I've already got by adjusting the weighting of some vertices.
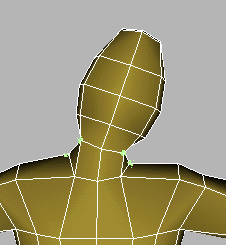
It's not perfect, but it's good enough for this model because there's a sense of pulling from the shoulders. The adjusted vertices are highlighted in green in the image. I added these colored dots to these images in Photoshop, so don't confuse them with the vertex weighting colors in MAX. Nor is one view good enough to see what's happening. You have to examine from every direction. It's slow, careful work.
We had best continue with the upper body. You've got to be absolutely methodical or you'll end up in knots. You might think to go on to the arms right now, or at least to the shoulders, but we need to consider rotation from the sternum first. The weighting that we've got now is awful.
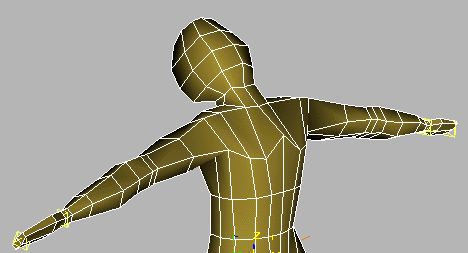
I selected and reweighted vertices along the chest and at the armpits to create a sense of muscular continuity, as reflected in the next image. I made similar adjustments to the back of the character.
| To Continue to Part 3, or Return to Part 1, Use Arrow Buttons |
|
Created: August 14, 2000
Revised: August 14, 2000
URL: https://webreference.com/3d/lesson99/2.html
 Find a programming school near you