3D Animation Workshop: Lesson 68: Trimming MAX NURBS | 2
|
|
Lesson 68 - Trimming MAX NURBS - Part 3
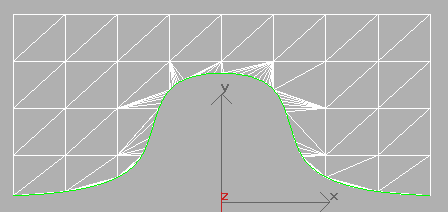
Like so much in NURBS, the actual trimming is achieved as part of the surface approximation process we discussed in Lesson 66. The surface approximation tools receive a NURBS surface and convert it to a polygonal mesh for rendering purposes. If trim curves have been applied to the surface, these curves are used to create borders for the polygonal mesh, and the polygons on one side of the border are disregarded.
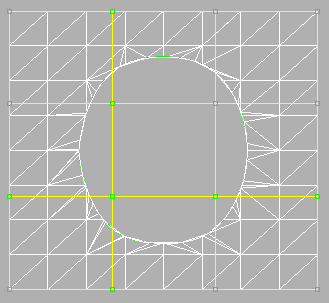
Here is a wireframe of the tessellated mesh. The surface is subdivided into triangles in the usual way. The trim curve is used as a border stitched into the mesh using a single layer of triangles. Note the greater degree of tessellation in the trim region. This is necessary to follow the curve nicely.
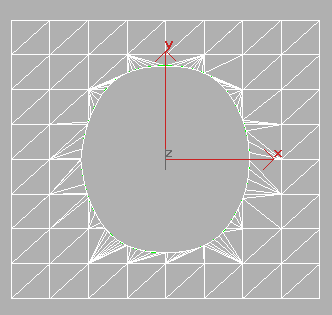
Because the trim curve forms a distinct edge that naturally attracts visual scrutiny, it's often useful to tessellate the edge region independently of the rest of the mesh. MAX 3 has introduced new surface approximation tools that operate separately on edges (including trimmed edges). The next image shows finer surface approximation parameters applied only to the edges. Note the increased tessellation around the trim, permitting a more precise, smoother curve.
Thus far we've been using a closed curve that fits entirely within a surface. To create a trim with a curve that fits entirely within a surface, the curve must be closed. Think carefully about why this is so. To create a trim, the application must be able to determine whether points on the surface are on one side or another of the trim curve. If a curve is closed, all points are either outside or inside the curve. But if a curve is open, there is no meaning to the concepts of "inside" and "outside." I stress this because so many of the times that you'll get a trimming error involve the failure to close a curve.
Now MAX could require that all trim curves be closed, regardless of whether they are fully within the surface. Softimage has this requirement, and it's no great hassle to comply with. But MAX is more forgiving of curves that extend off the surface. These curves need not be closed.
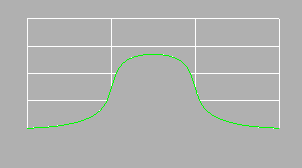
The following image is a front view of an open curve ready for projection on the surface. Note how it extends over the edges of the surface.
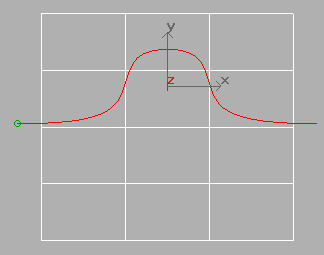
Because the trim curve both enters and leaves the surface, its possible to assign points on the surface unequivocally to one or the other side of the curve. Thus the curve can be trimmed in one direction--
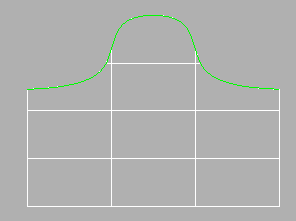
or the other.
Once again, the trim is actually executed in the surface tessellation process.
| To Return to Parts 1 and 2, Use Arrow Buttons |
|
Created: June 8, 1999
Revised: June 8, 1999
URL: https://webreference.com/3d/lesson68/part3.html


 Find a programming school near you