3D Animation Workshop: Lesson 65: Basic MAX NURBS Surfaces
|
|
Lesson 65 - Basic MAX NURBS Surfaces - Part 2
Let's get back to MAX NURBS.
In the previous lesson, we learned about MAX's NURBS Surface objects (composed of one or more NURBS surfaces or curves) and about the distinction between dependent and independent surfaces. Dependent surfaces are controlled by the curves from which they were made (often called "generator curves"). Once a surface is made independent, you are given access to the control vertices (CVs) that, strictly speaking, define its contours.
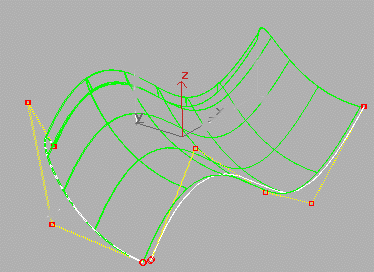
There are many tools for creating surfaces. You can start with 3D primitive objects and convert them to NURBS. The most important example is the sphere. But NURBS modeling is mostly about building surfaces directly out of curves. You can extrude a curve, either along a straight line or along a curved path. Extrusion along a curve is called a rail sweep. The following image illustrates a single rail sweep. The shorter curve extruded (swept) along the path of the longer curve (called the "rail") to create the surface. Note how the extrusion surface follows along the edge of the shorter curve, as though the rail curve were first moved to the precise end of the shorter curve before the sweep is executed. The surface is a dependent object. Moving any of the CVs along either of the two curves (shown selected in red) will cause the surface to update as if a new sweep surface had been created.
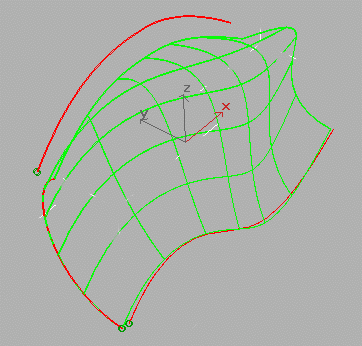
By adding another rail curve on the other side of the curve being swept, we can create a two-rail sweep. Once, again notice how the rail curves are effectively snapped to the ends of the extruded curve when building the surface. (To make the screen shots easier to understand, I've tried to erase out most of the white bounding box lines. Please ignore the spots I couldn't easily reach.)
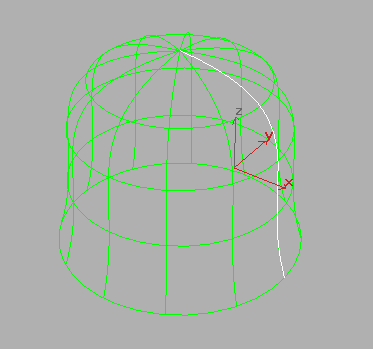
Another major approach to building surfaces is to lathe curves around an axis. (This operation is called "revolution" in Softimage.)
But the most important surface-building tool is the loft. The central concept of surfaces in NURBS modeling is as a series of curves running in the same direction that are "skinned" or "lofted" to create a surface. MAX uses the term "loft," but the word "skin" is so conventional that I'll be using both in these lessons.
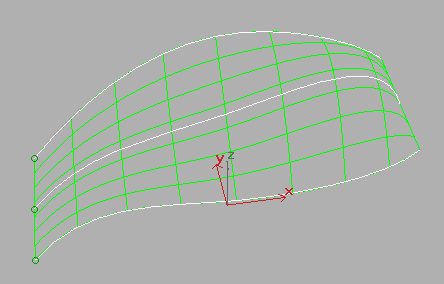
The following image shows a surface lofted from three curves. This loft surface is a dependent object. The user does not yet have access to the actual CVs that define the surface. The object can only be edited by moving the CVs on the defining curves.
The lofted surface may seem familiar to you from polygonal modeling. MAX has its well-known Loft Object that connects up Bezier splines along a path to create a surface. But in NURBS, a lofted surface is a much more flexible creature. That's because you can pull curves off a surface.
| To Continue to Part 3, or Return to Part 1, Use Arrow Buttons |
|
Created: Apr. 28, 1999
Revised: Apr. 28, 1999
URL: https://webreference.com/3d/lesson65/part2.html
 Find a programming school near you