3D Animation Workshop: Lesson 63: Puppet Master Plus
|
|
Lesson 63 - Puppet Master Plus - Part 2
I took the character model we've been working with, cut off the arms, and them built them out again to create real shoulders. The mesh now turns a sharp corner, and as before, the upper arm actually penetrates into the body.
The result once the model is smoothed with MetaNURBS is pretty good, from both the back and the front.
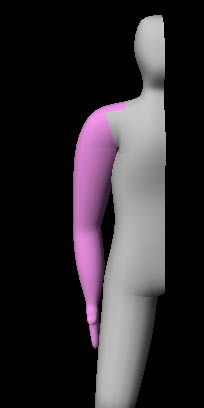
Although we're looking at a screen shot in Lightwave Modeler, the pink polygons are those that will constitute the arm section in Puppet Master. It was very difficult to determine precisely where the border between the body and arm sections should be. I had to experiment with a lot of possibilities before I decided on this arrangement. Note how the polygons (and therefore vertices) on the top of the shoulder have been included in the arm section.
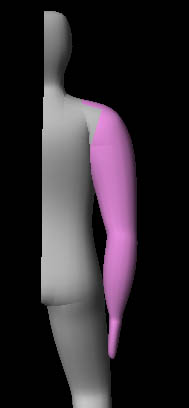
Still in Modeler, we rotate the arm around point near the tip of the shoulder, where the pivot point will be placed in the animation program. The shoulder gets crushed because the vertices on the top of it rotate downward into the body as the arm rotates up.

To correct the situation, we build a morph target. Using only points on the arm section, we edit until the model looks correct in its new pose. This will enable the mesh to correct itself using only a single morph on the arm. Now you can see why I needed to include the region on the top of the shoulder in the arm section. The following picture shows the mesh of the morph target on top of the base model.
Next, it's on to Lightwave Layout to set up Puppet Master. The scene includes the arm and body sections, the morph target for the arm, the anchor object (the entire mesh) and the meta (smooth) version of the anchor. The next picture shows the complete setup with the meta version of the mesh visible and the arm section selected for posing. In Puppet Master, the arm section is set to morph into its target as it lifts.

So how does the morphing look? Check out the animated clip on the next page,but be prepared to wait a minute while it loads.
| To Continue to Part 3, or Return to Part 1, Use Arrow Buttons |
|
Created: Mar. 30, 1999
Revised: Mar. 30, 1999
URL: https://webreference.com/3d/lesson63/part2.html
 Find a programming school near you