3D Animation Workshop: Lesson 62: Puppet Master
|
|
Lesson 62 - Puppet Master - Part 2
Puppet Master must be one of the best-kept secrets in the world. There's almost nothing available about it on the Web, and the measly documentation that comes with the disk is woefully inadequate. You've got to experiment with this thing to figure it out. It's a professional tool that's been kept within professional circles.
The idea is simple and attractive. Take a character model and divide it into sections that are intended to rotate separately. In the Lightwave animation program (Layout), you can rotate the sections themselves, rather than bones inside them, and keyframe the rotations to create an animation. This description is fundamentally oversimplified, as we shall see, but it's a starting point.
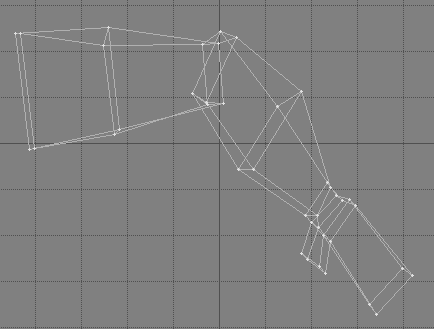
Let's use only an arm from the character model developed in the previous lesson to understand the process. The key to using Puppet Master is staying organized. I've divided the arm into three sectionsÂthe upper arm, the forearm and the hand. To keep track of them, I've assigned the three sections different surface names and given them separate colors.

The surfacing is just an organizational tool. The model that will ultimately render, using MetaMation, will be a smoothed version and can have a completely different surface. Like so.

Note the gray bands separating the colored sections. In Puppet Master, all of the vertices in the model must be included in sections, but this gives you two choices where sections meet. The two sections can abut each other, or they can be separated by a single row of quadrangles. The ability to leave this space open is quite valuable. For example, if we rotate the forearm and hand sections inward, the space allows the polygons at the elbow to interpenetrate each other. As we learned in the previous lesson, this interpenetration of polygons creates a nice fold in the "flesh" after the geometry has been smoothed. Note the "crunching" of the polys in the elbow in the wireframe view and the resulting crease in the smooth shaded view (after geometric smoothing).


This, by the way, brings up an important advantage of Puppet Master. Because Puppet Master works by rotating groups of polygons, you can test out a lot of things in the modeling program before you even start the Puppet Master setup. Rotating selected polygons in the modeling programs does not always produce exactly the same result as Puppet Master, but it's certainly close enough for most testing purposes.
Let's try it out in Puppet Master.
| To Continue to Part 3, or Return to Part 1, Use Arrow Buttons |
|
Created: Mar. 15, 1999
Revised: Mar. 15, 1999
URL: https://webreference.com/3d/lesson62/part2.html


 Find a programming school near you