3D Animation Workshop: Lesson 59: Stepping Nicely
|
|
Lesson 59 - Stepping Nicely - Part 1
In this lesson, we'll put together what we've learned in the two previous lessons. to create short walking animation.Our character will take two steps. First, the back leg will move to the front leg position. Then the other leg (formerly the front, but now the back) will move to the front position. These complementary movements form a single unit, and ounce we have accomplished this much, it will be relatively easy to repeat the cycle.
Let's distinguish between what we will be doing here and the traditional walk cycle "in place." In 2D cel animation, it makes sense to create a sequence in which the character walks in place, with the feet simply shifting back and forth. Moving this sequence against the background creates the illusion of walking. We can do this in 3D animation as well, and it's an important technique. But we can also create a true walking motion in which the character covers ground with each step. This is the technique we'll use here, and it relies on IK (inverse kinematics).
Our character will start in the middle of a walk, with the legs fully separated and both feet on the ground. It's very important to get the right pose from the start, or we'll always be making corrections.

Use this image to refresh your memory about the Lightwave MetaMation process. The low-poly "cage" model, highlighted in yellow wireframe, is the object that has the bones and is actually being animated. The high-poly smooth version is created from the low-poly version on a frame-by-frame basis. This image shows both together. Most of the animation process is done viewing only the low-poly cage because it's easy to see the bones inside and the previews run much faster. However, we'll be showing the finished high-poly version in these illustrations so that you can see the final effect.
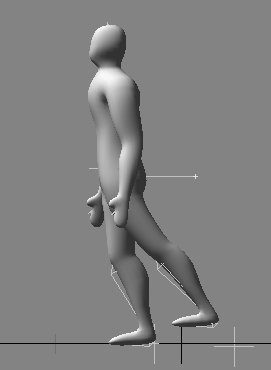
Let's plan this out. Video runs at 30 frames per second. Two steps per second is a moderate walking pace, so we'll make this a 30-frame animation. The first step will plant at frame 15 and the second step at frame 30. We move to frame 15 and, after selecting the root bone of the system (at the pelvis), we translate it forward until what was formerly the front leg looks like the back leg. This is possible because the feet are held to the ground by their IK goals. The line in the next picture traces the motion path of the root bone between Frame 0 and Frame 15.
The next step is to move what was originally the back foot to the front at frame 15, using the foot's IK goal. Thus, at the end 15 frames, the feet positions will be exactly reversed.
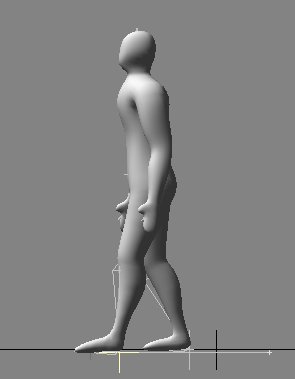
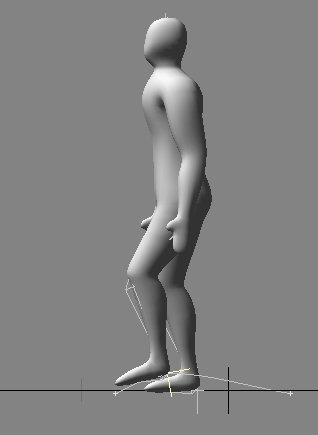
Notice how the motion path of the foot goal is a straight line. As a result, the foot will drag along the ground. We'll correct that by going to frame 10, and translating the goal off the ground. We also tilt the foot a little by rotating the goal, so that the step does not seem rigid.
Let's check the motion with a tiny clip.
| To Continue to Parts 2 and 3, Use Arrow Buttons |
|
Created: Feb. 1, 1999
Revised: Feb. 1, 1999
URL: https://webreference.com/3d/lesson59/
 Find a programming school near you