3D Animation Workshop: Lesson 55: More Texture Mapping
|
|
Lesson 55 - More Texture Mapping - Part 2
How about scaling the projection gizmo so that it fits the dimensions of the wall? Like so.
There's an obvious problem here. By stretching the projection, we've stretched the map so that the blue and yellow squares are now rectangles, longer horizontally than they are vertically. So this method is not going to work.
A better approach uses tiling. By permitting the bitmap to tile, it repeats itself across the surface of the model, in one or both dimensions. Here we rescale the projection gizmo so that the projection is perfectly square and the same height as the wall. With tiling in the horizontal direction, the pattern is correctly repeated across the back wall without distortion.
But now there's a problem with the side wall. A planar projection for one wall won't make sense for another. The pattern at the corner is simply smeared along the side wall.
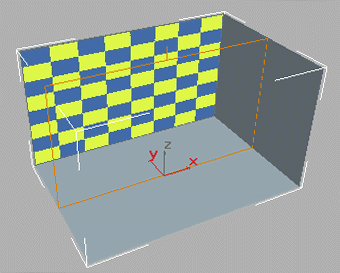
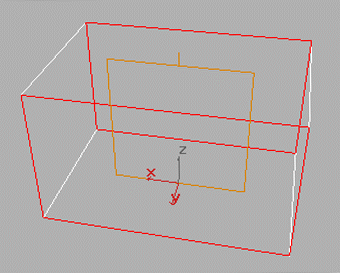
A couple of answers may occur to us. One possibility is to angle the projection into the corner to catch both walls on an equal slant.

This can look pretty convincing, but it takes a careful touch to get the projection just right. The size of the pattern is not exactly the same on both walls, but in many contexts this will not be noticeable.
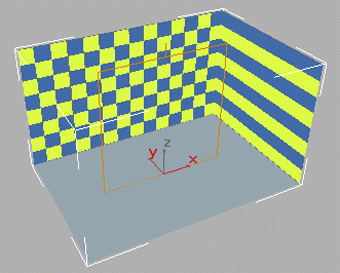
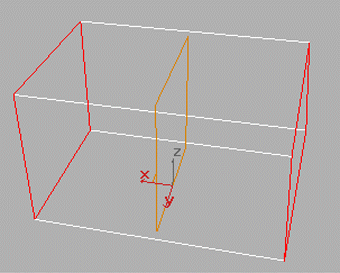
Another approach is to divide the job up, with separate projections for the two pairs of walls. In MAX, this involves creating separate material ID's for the two pairs of walls, so that each can have the texture applied separately. Here are the pairs of selected polygons and their respective projections.
So how does this end up looking?
| To Continue to Part 3, or Return to Part 1, Use Arrow Buttons |
|
Created: Dec. 8, 1998
Revised: Dec. 8, 1998
URL: https://webreference.com/3d/lesson55/part2.html
 Find a programming school near you