3D Animation Workshop: Lesson 38: Softimage--Closing NURBS Surfaces
|
|
Lesson 38 - Softimage--Closing NURBS Surfaces - Part 1
In our previous lesson, we introduced the basic NURBS patch, or (more properly) NURBS "surface" as it is called in Softimage. It is a grid of curves, specifically NURBS curves. A wireframe example will refresh our memory. The red row of tagged points has been translated up to edit the shape.
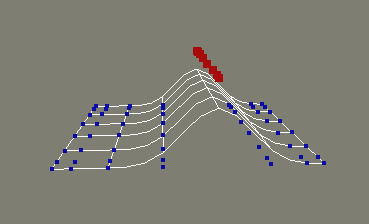
The curves run in two directions, u and v. As a general proposition, the u direction is horizontal and the v direction is vertical, but this characterization can quickly become meaningless in practice. One of the hardest aspects of learning spline modeling, whether in Softimage or any other application, is becoming accustomed to thinking in the u,v coordinate system. Abstract talk doesn't help much. You've just got to jump in and work with it. Take comfort in the knowledge that it's hard for everyone.
A curve, apart from a surface, has only a u dimension. The start point of the curve is at u = 0. Here is an open NURBS curve.
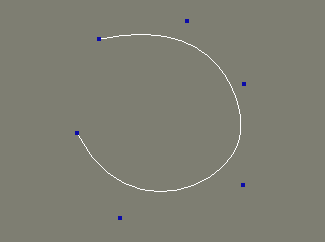
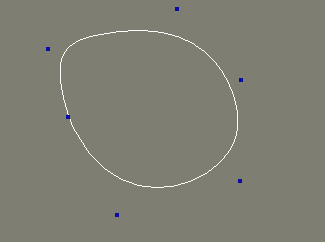
Unlike other kinds of splines, a NURBS curve can be closed without changing its shape. The region between the start point and the end point is simply joined, and the shape of the join can be easily controlled.
The very same ideas can be brought to NURBS surfaces. If we take our original open NURBS (remember that it's just as correct to say NURBS as NURBS curve) and extrude it, we produce a curved surface. The original curve, and those parallel to it become the u curves in the surface. The curves running perpendicular to these (along the axis of extrusion) become the v curves.

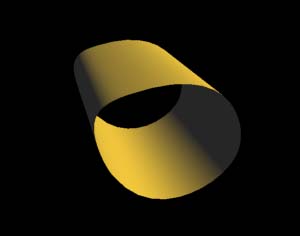
A render will help us to understand the wireframe surface better.

Just as we closed the single NURBS curve above, we can close the surface in the u dimension. In effect, we are closing all of the u curves together.

And here's a render.
But there are much better ways to create closed surfaces than by closing open ones.
| To Continue to Parts 2 and 3, Use Arrow Buttons |
|
Created: April 14, 1998
Revised: April 14, 1998
URL: https://webreference.com/3d/lesson38/
 Find a programming school near you