3D Animation Workshop: Lesson 37: Softimage--Introducing NURBS Surfaces
|
|
Lesson 37 - Softimage--Introducing NURBS Surfaces - Part 2
NURBS or other spline surfaces are best understood when compared with explicit polygonal meshes.
Take a simple square polygon. The points are vertices (not control points) and they are connected by straight lights (not curves).

This is fine if we want a flat surface, but if we need curvature, we'll have to subdivide the square into a grid.

This polygonal grid is hardly dense enough to model any real curvature, so we'll probably have to subdivide further. Like so.
At this stage, the grid is getting dense enough to support more detailed modeling but the crowding of the points makes selection and editing difficult. It will also take some careful tweaking to create smoothly curving surfaces. So let's try a different approach.
What if our square were bounded by four NURBS curves rather than by four lines. Like so.
Note the differences in this approach. The points are all NURBS control points, not vertices of polygons. And there are control points crossing the surface in the middle, and not just along the bounding curves. We have created the simplest possible NURBS "patch." As flexible as a piece of cloth, it has no more points than our earlier subdivided polygon.
The word "patch" can be very confusing when used in Softimage. A surface bounded by splines (rather than by rigid lines) is generally called a patch in computer graphics, and contrasts with a polygon (which IS bounded by rigid lines). Before NURBS were implemented in Softimage, the program supported only patches made from other splines, typically B-Splines. After NURBS were added, Softimage decided to keep the word "patch" reserved only for non-NURBS patches, and to speak of NURBS "surfaces." This distinction can be hard to remember, because NURBS surfaces are patches just as much as those made from other splines. Thus, although we'll occasionally speak of NURBS patches here for convenience and conceptual clarity, be aware that Softimage uses a different terminology in its interface.
Looking at our NURBS patch in a perspective view and slightly edge on, we find ourselves with a fluid surface, ready for subtle deformation with only a few control points.
The four control points that cross the grid, but which are not associated with a visible curve in a wireframe view, are tagged in red for reference.

If we move the control points on the border curves, the surface is not longer bounded by straight lines. But notice how the tagged points have not been moved.

It's hard to read the result in wireframe, so here's a rendered view.
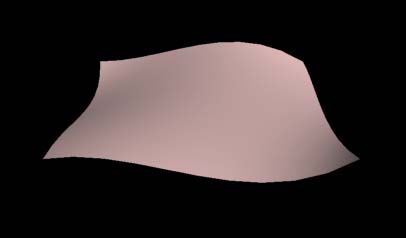
Pretty slick, huh? I kept the step value down a little so that we can see the small linear breaks along the edges. We can make it perfectly smooth by upping the step count to break the curves into smaller units.
But we still haven't used our red interior points.
| To Continue to Part 3, or Return to Part 1, Use Arrow Buttons |
|
Created: March 30, 1998
Revised: March 30, 1998
URL: https://webreference.com/3d/lesson37/part2.html
 Find a programming school near you